Documentation Index
Fetch the complete documentation index at: https://docs.heymilo.ai/llms.txt
Use this file to discover all available pages before exploring further.
Form Screening
Set up automated form-based screening in HeyMilo! Candidates complete a tailored set of questions via an online form, and HeyMilo’s AI evaluates their answers instantly for you to determine fit and next steps.
When to Use Form Screening
Create a New Interviewer
Step 1 — Create Interviewer
- Click Create Interviewer in your HeyMilo admin panel.
- In Interview Stages, add Form Screening
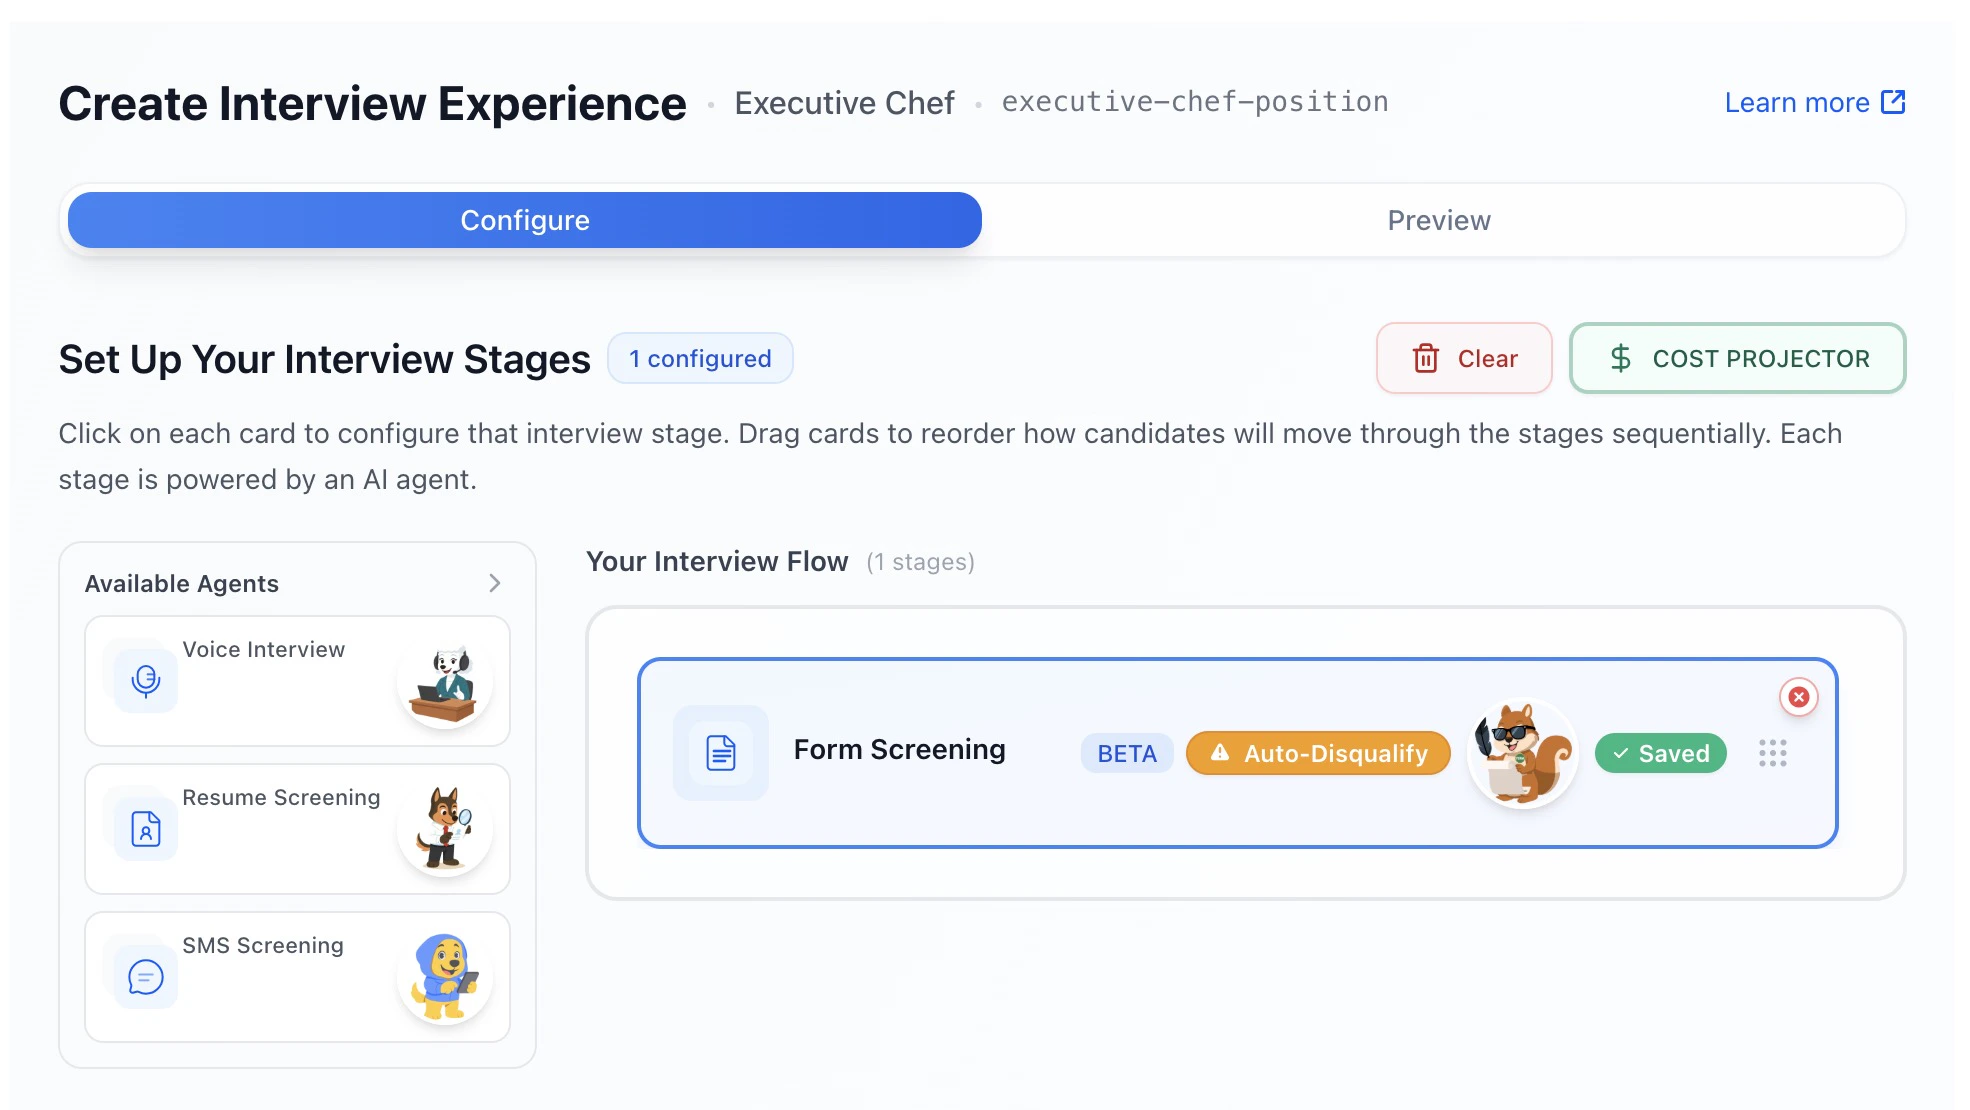
- Click the Form Screening card to configure it
Step 2 — Enforce Eligibility Criteria
At the top of Form Screening, you’ll see: Enforce Criteria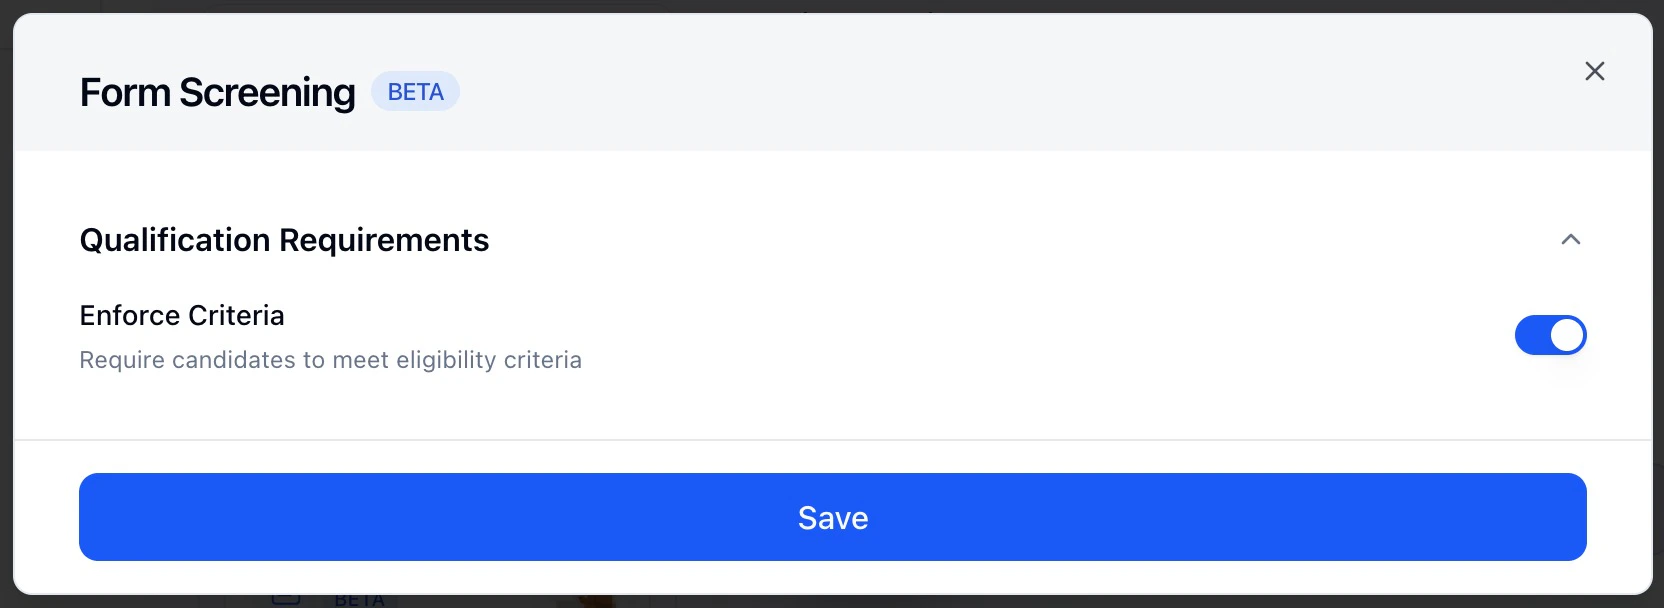
- ON → candidates must meet eligibility requirements to continue
- OFF → all candidates move forward regardless of answers
Before Questions & Scoring, preview the flow to make sure you have the agent placed in the correct stage.
Step 3 — Add and Manage Form Questions
All form setup happens inside Questions & Scoring → Application Form Questions.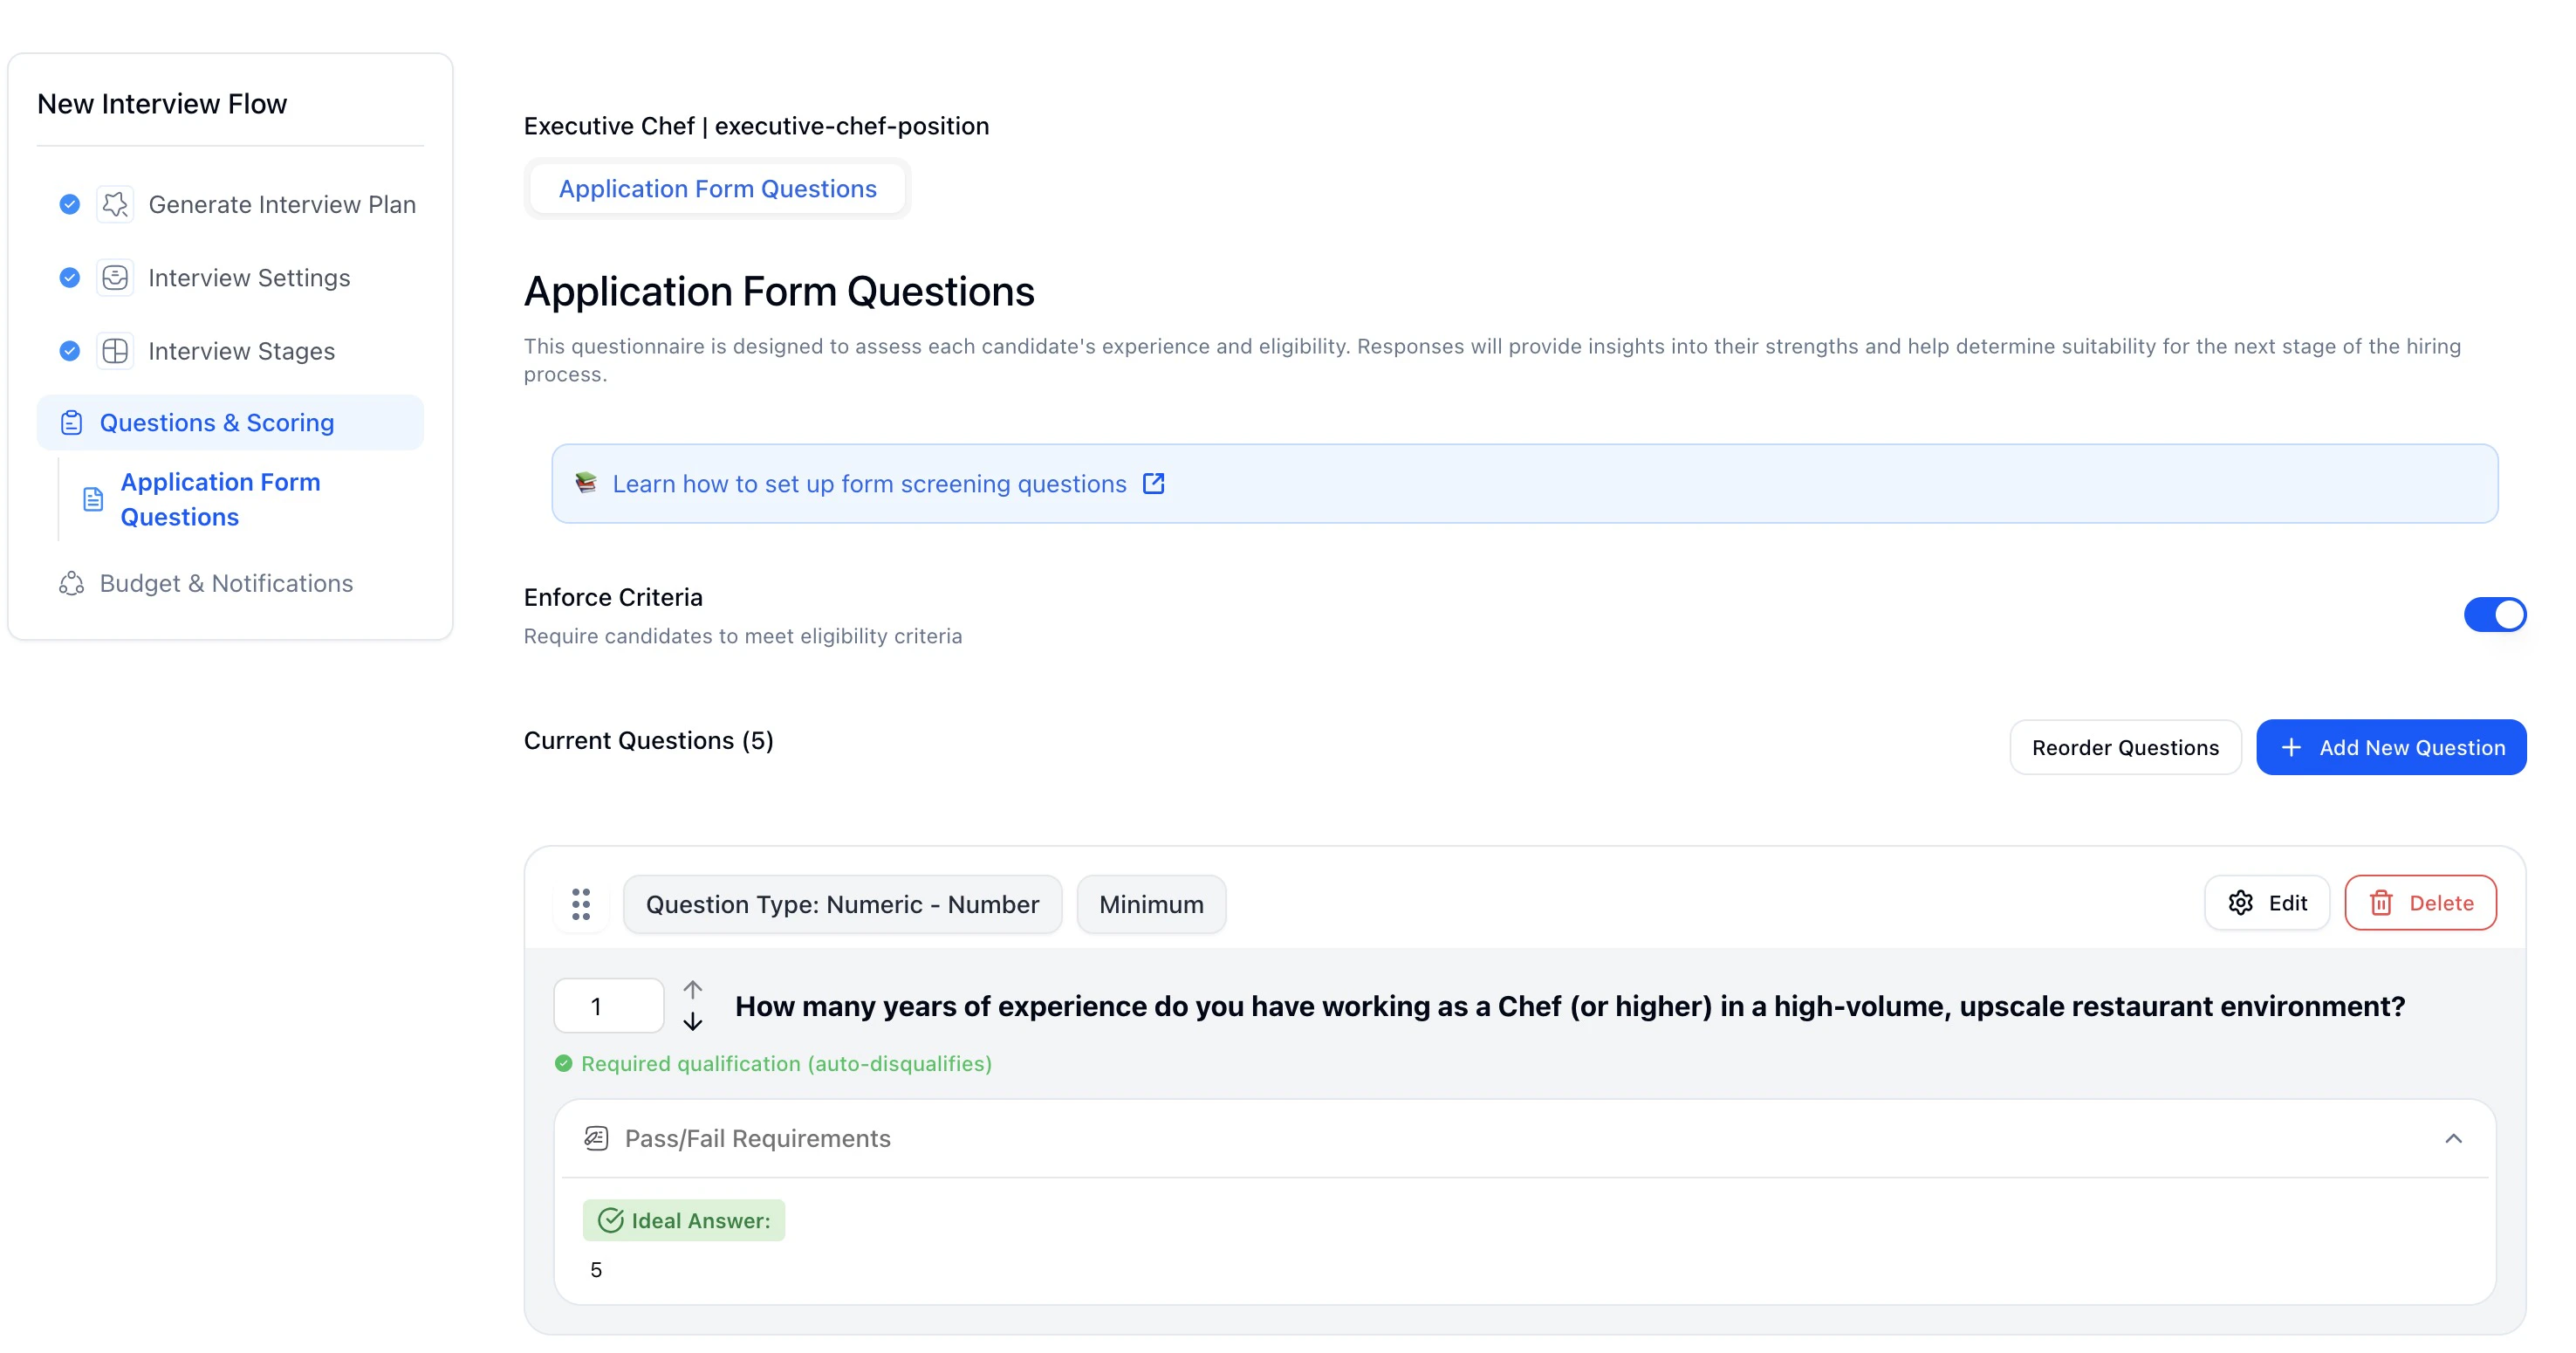
- HeyMilo generates starter questions, but everything is customizable.
- Short Answer
- Multiple Choice
- Numeric
- Date
- File Upload
Free text responses.
An important note, all AI-generated form questions are mandatory by default, but deal breakers are not enabled automatically. If a question should impact screening outcomes, make sure to check the “Deal Breaker” box.
Step 4 — Required Qualifications (Dealbreakers)
Any form question can be marked as a required qualification.
- Candidates must meet the ideal answer
- Failure auto-disqualifies them moving on to the next steps
Step 5 — Ideal Answers & Evaluation
For each question, you define: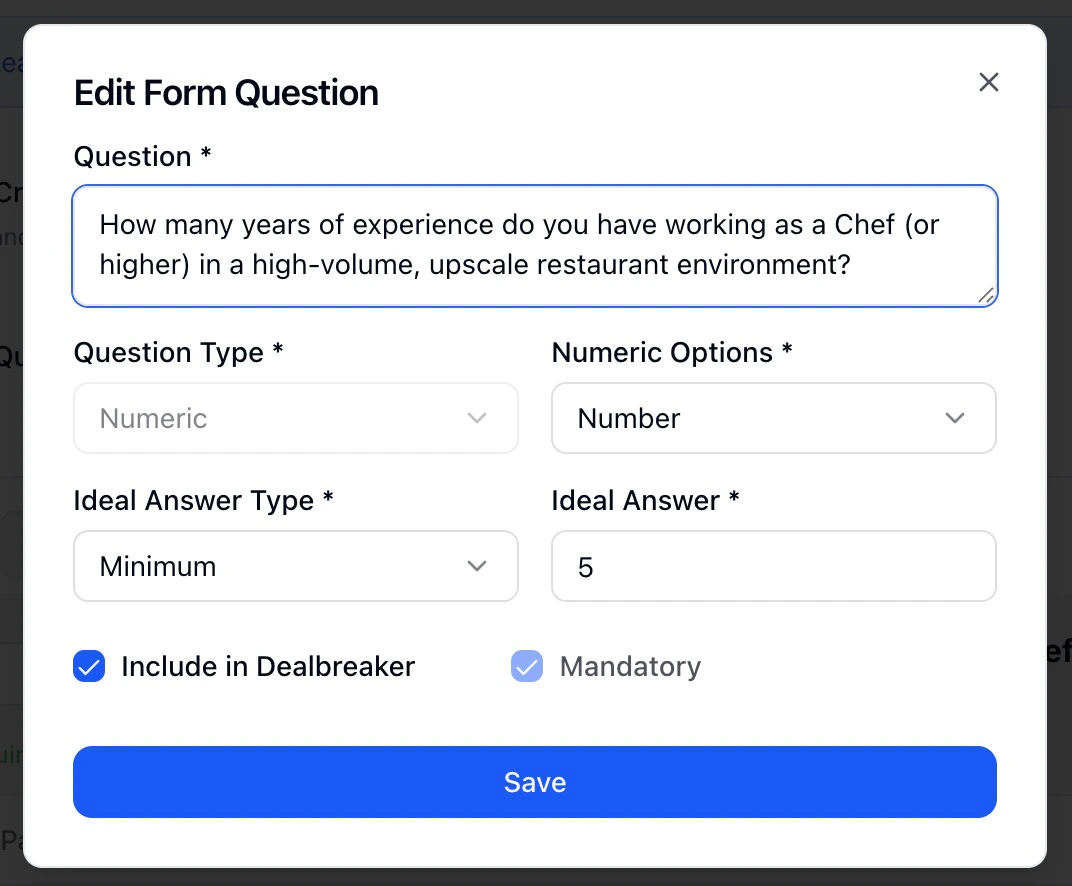
- Ideal Answer Type
- Minimum value
- Specific answer
- Valid file or content requirement
- Dealbreaker toggle
- ON = eligibility requirement
- OFF = informational only
Step 6 — Reorder Questions
You can drag and drop questions to reorder them.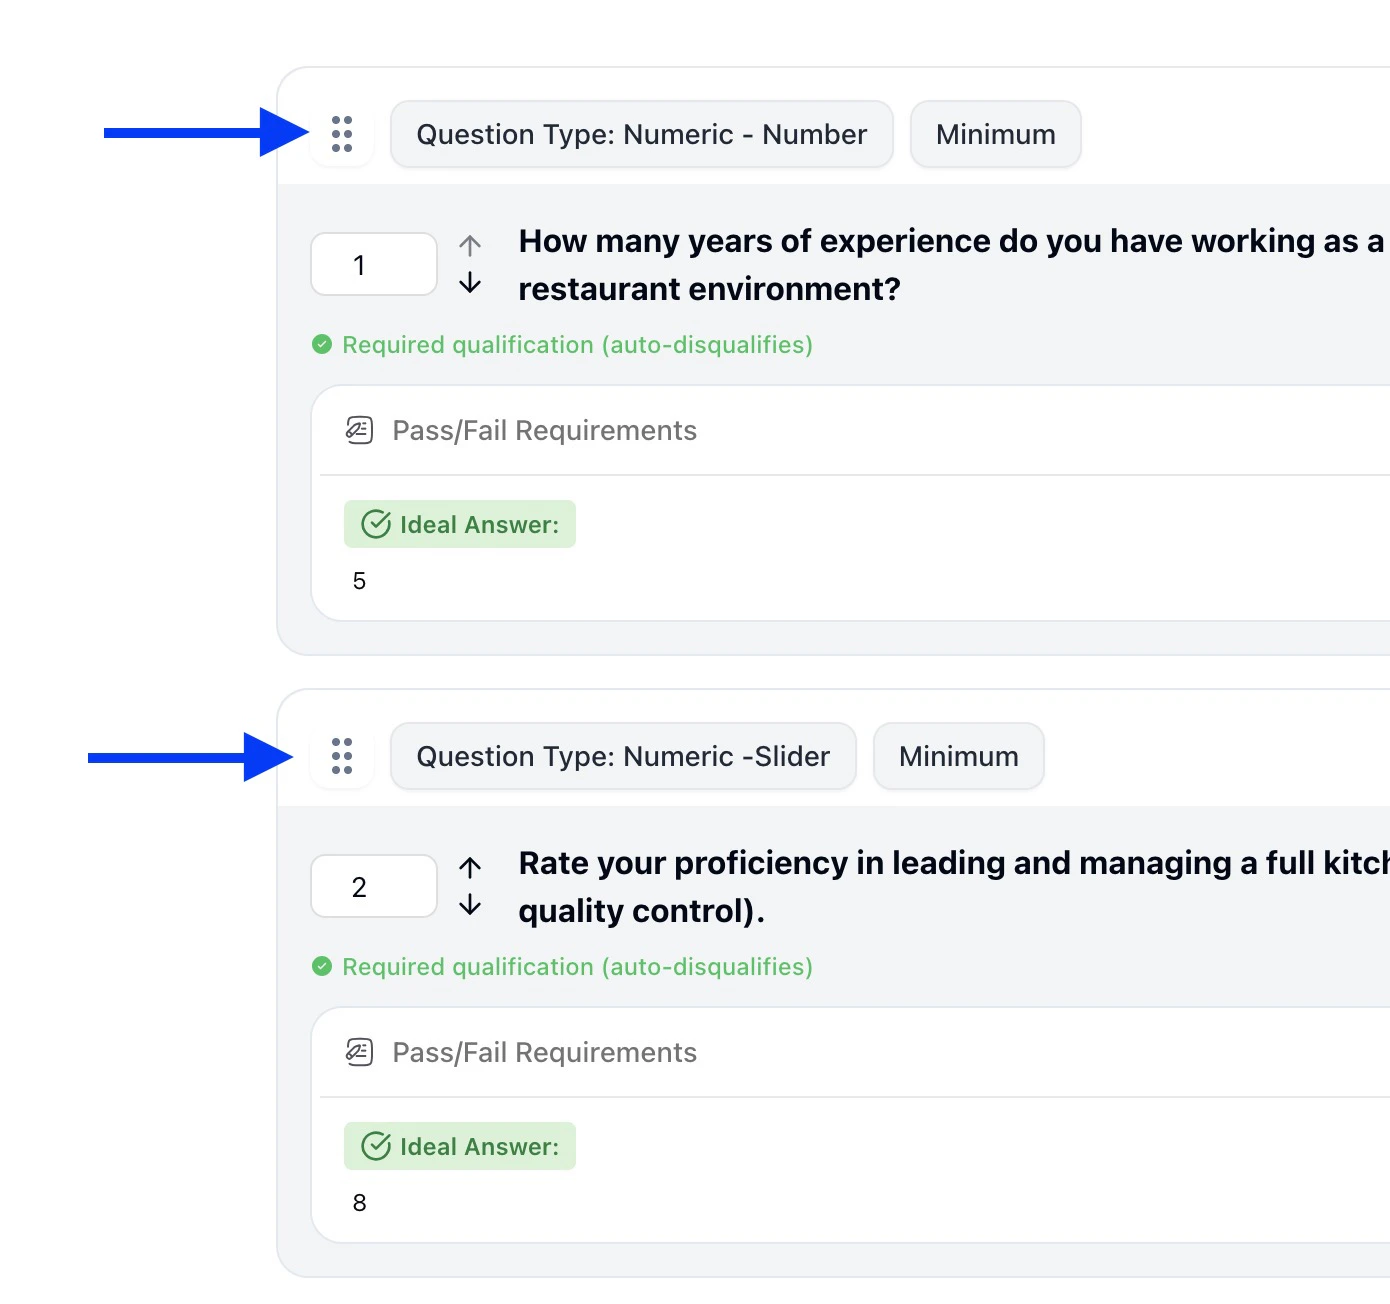
- Put hard requirements first to fail fast
- Ask easier questions before document uploads
- Improve candidate completion rates
Step 7 — Test Before Activating
Click Test Now to experience the form as a candidate.Testing lets you: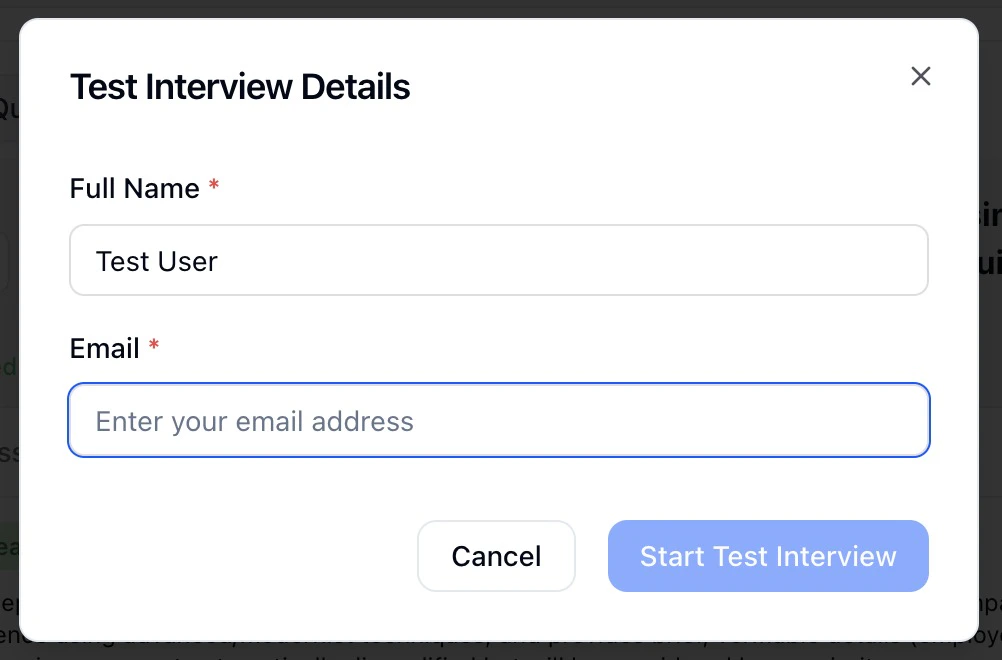
- Verify eligibility logic
- Catch unclear wording
- Ensure file uploads work
- Confirm pass/fail behavior
Step 8 — Activate and Use in Your Workflow
Once saved and activated:
- Candidates receive the form automatically
- Responses are evaluated instantly
- Only qualified candidates move forward
Step 9 — Reviewing Form Screening Results
Form results appear directly in the candidate profile under the Form tab (along with other agents layered in).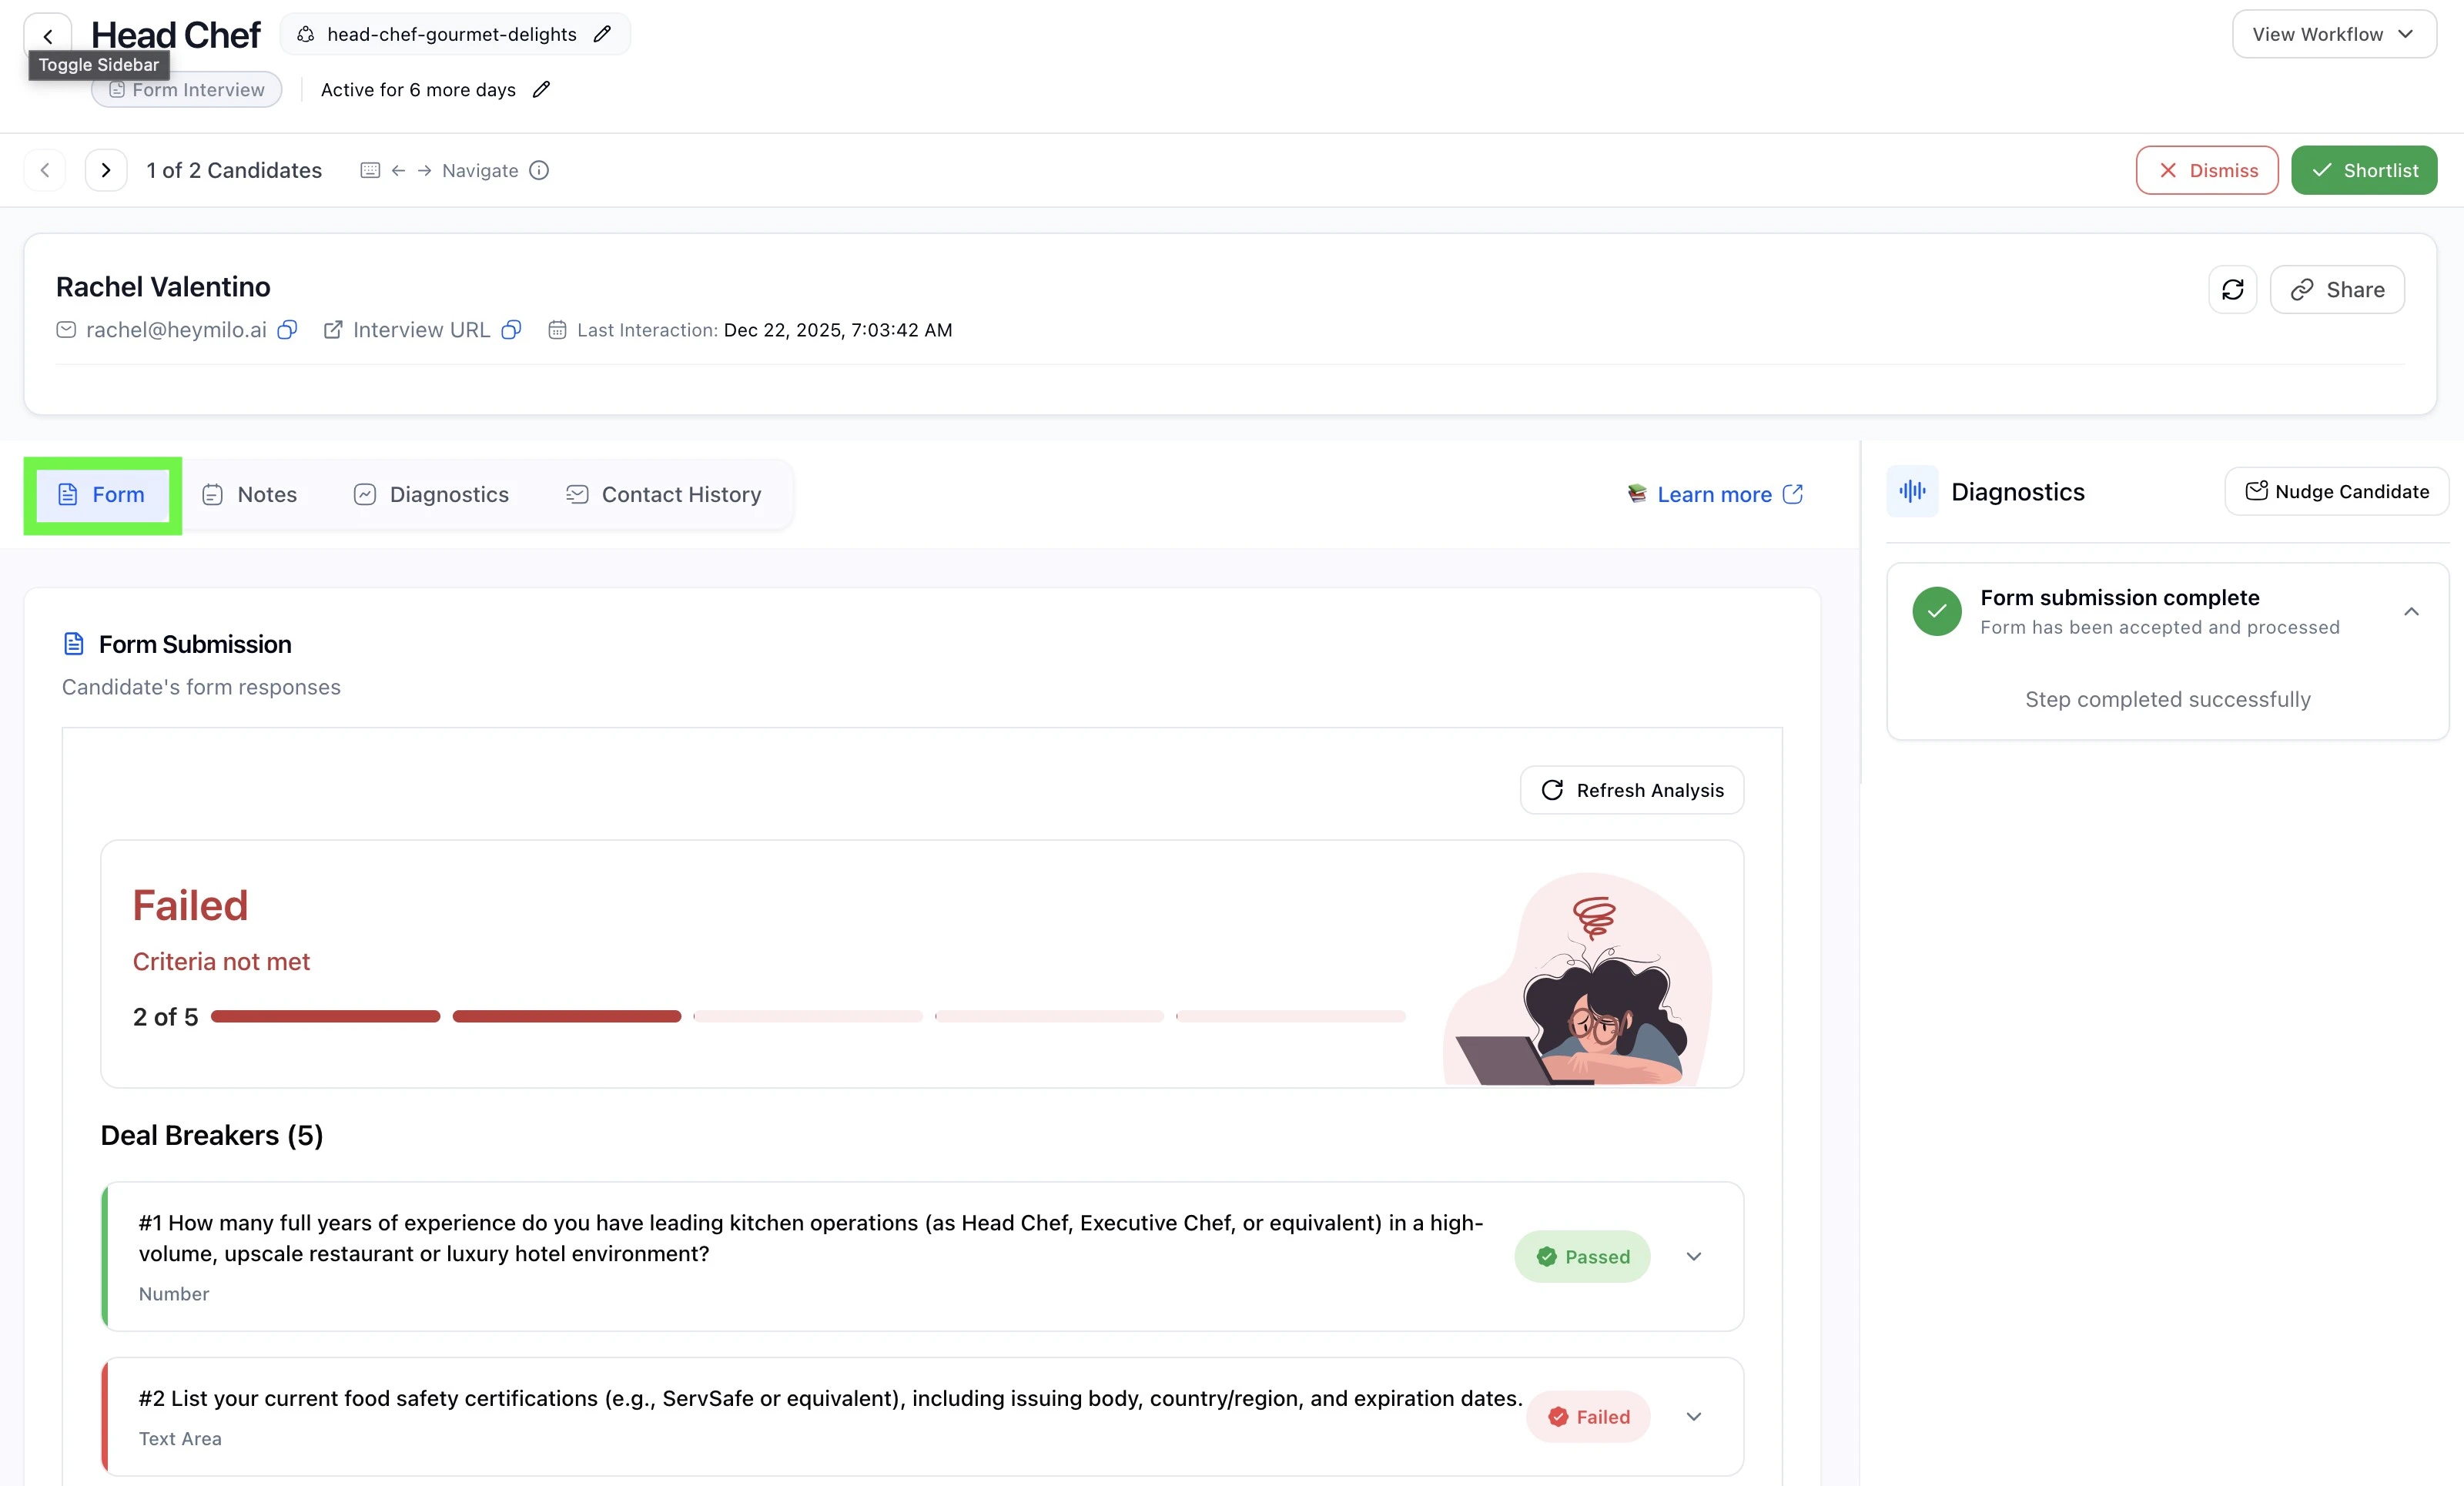
- Pass or fail status
- Which criteria were met or failed
- Exact answers provided
- Uploaded files
- Clear dealbreaker explanations