

Roles control what people can do. Teams control which postings they see. Each person has one role and can be on one or more teams.
People
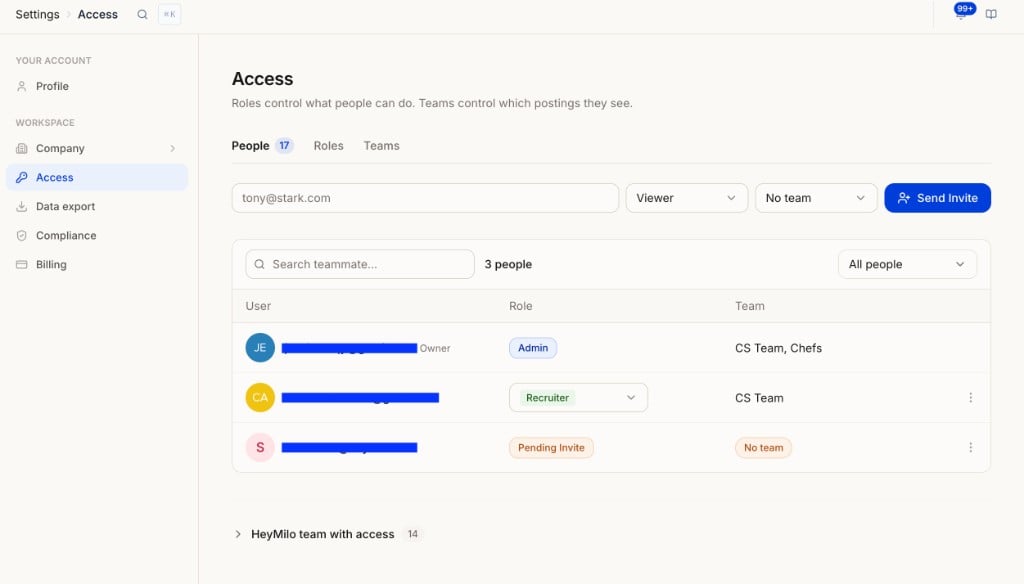
Invite a teammate
1
Enter their work email
Type the address in the invite field at the top of the People tab.
2
Pick a role
Choose Admin, Recruiter, Viewer, or one of your custom roles. Not sure? Start with Viewer and upgrade later.
3
Pick a team (optional)
Choose a team, or leave No team. See Teams for what that means for what they can see.
4
Click Send Invite
They get an email to join. Until they accept, they show as Pending Invite in the list.
The people list
Use Search teammate to find someone by email, and the All people dropdown to filter the list. The count next to the search bar (for example 3 people) is your own team. The People tab badge is higher because it includes HeyMilo staff.
HeyMilo team with access
At the bottom of the People tab, HeyMilo team with access lists HeyMilo staff (your CS Manager and support) who can view your workspace to help you. They’re kept separate from your own people.Manage a teammate
Roles
Roles decide what a person can do anywhere in the workspace.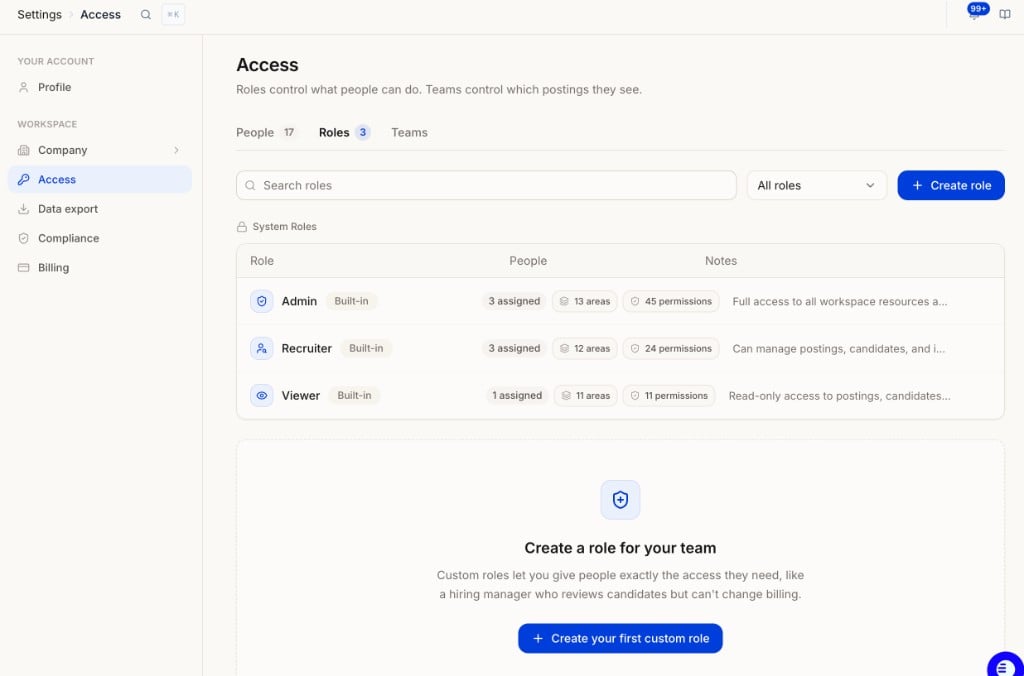
System roles
Three Built-in roles come with every workspace. You can’t edit them.
Each row shows how many people are assigned, how many areas of the product the role can reach, and how many individual permissions it includes. Click a role to see the full list.
Use Search roles and the All roles dropdown to filter once you have custom roles.
Create a custom role
Custom roles give people exactly the access they need, like a hiring manager who reviews candidates but can’t change billing.1
Open the Roles tab
Go to Settings → Access → Roles and click Create role (or Create your first custom role if you don’t have any yet).
2
Name it and say what it's for
Enter a Name (for example Hiring Manager) and a short note under What it’s for (for example Reviews candidates for their own openings). The note shows in the Roles list so teammates know when to use it.
3
Pick permissions
Expand each category and tick the permissions you want. Select all and Clear all are at the top. The counters on the right show how many areas and permissions you’ve picked so far.
4
Click Create role
Then assign it to people from the People tab using the role dropdown.
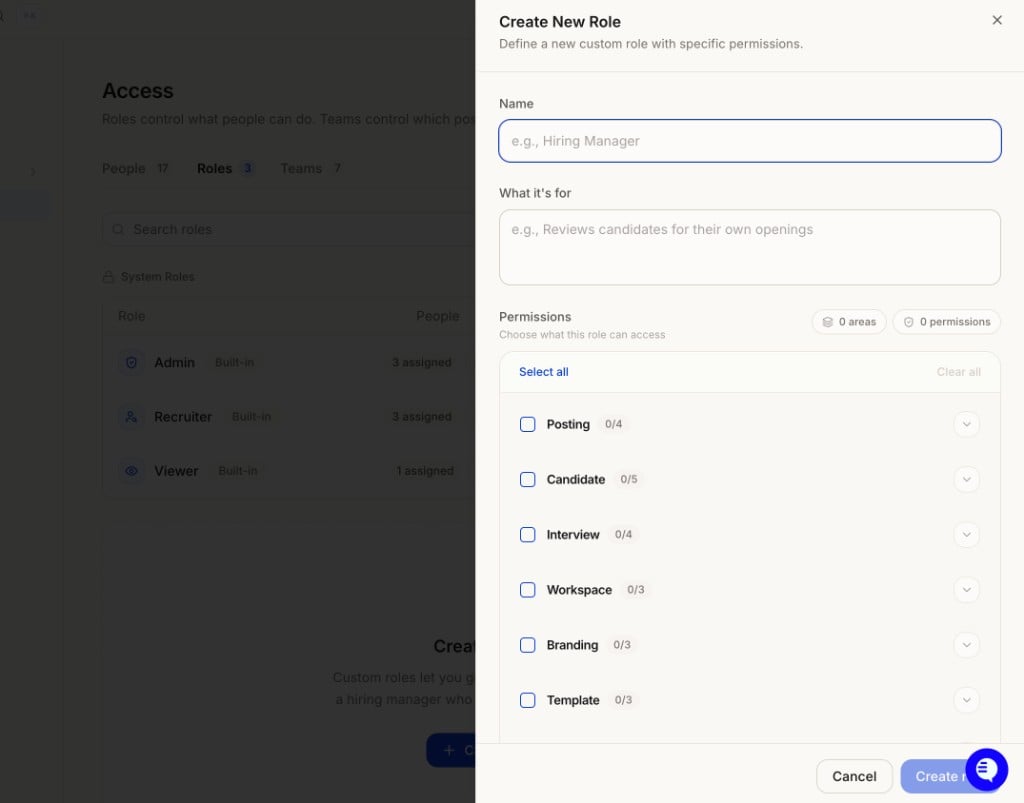
Permission categories
Each category shows how many of its permissions are on (for example Candidate 0/5). Scroll the panel for the full list.
Teams
Teams decide which postings a person sees. Use them to split the workspace by department, region, or client.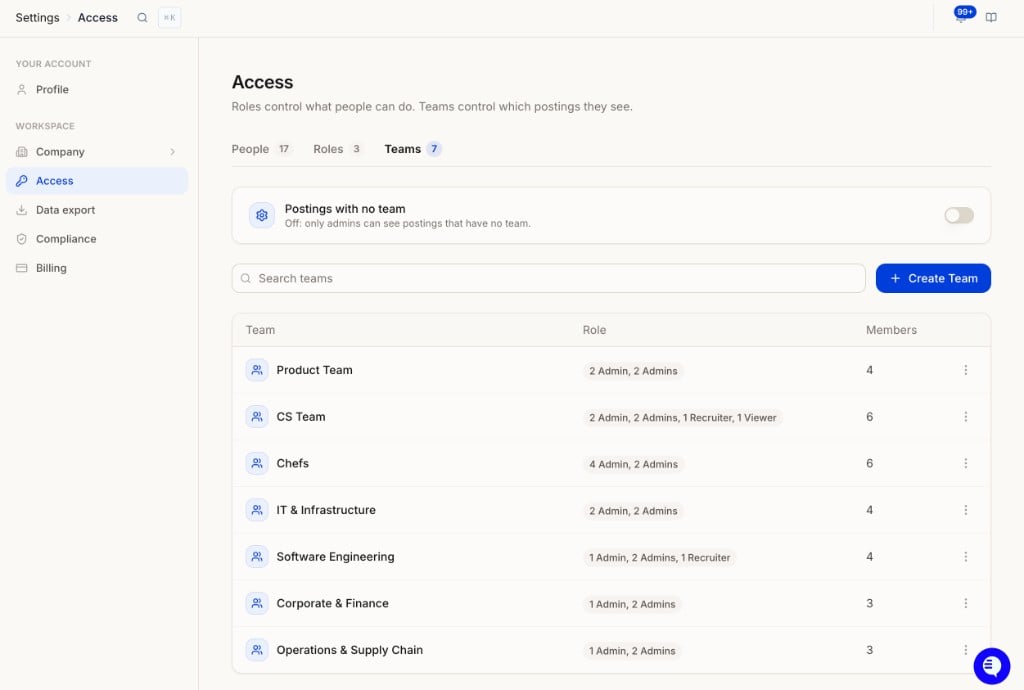
Postings with no team
The toggle at the top decides who can see postings that aren’t assigned to any team.- Off (default): only Admins can see postings with no team.
- On: everyone in the workspace can see them.
Manage teams
- Create a team: click + Create Team, name it (for example Software Engineering, CS Team, Chefs), and add members.
- Find a team: use Search teams.
- Edit or delete a team: open the ⋮ menu on the row to rename it, change members, or delete it.
How teams and postings connect
- A person can be on more than one team. They see every posting assigned to any of their teams.
- Each interviewer belongs to one team at a time. When you create one, it goes into whichever team you have selected.
- To move an interviewer, open it, click Actions, then Assign to team.
- Admins see all postings regardless of team.
Common setups
Related pages
- Company → General: company name, logo, and location
- Billing: plan, credits, and usage
- Compliance: data retention and deletion requests