

Before you start
Sidebar → Scheduling Setup order:- Sidebar → Scheduling → Your Calendar
- Sidebar → Scheduling → Availability
- Sidebar → Scheduling → Templates
- Assign a template when creating an interview agent
Your Calendar
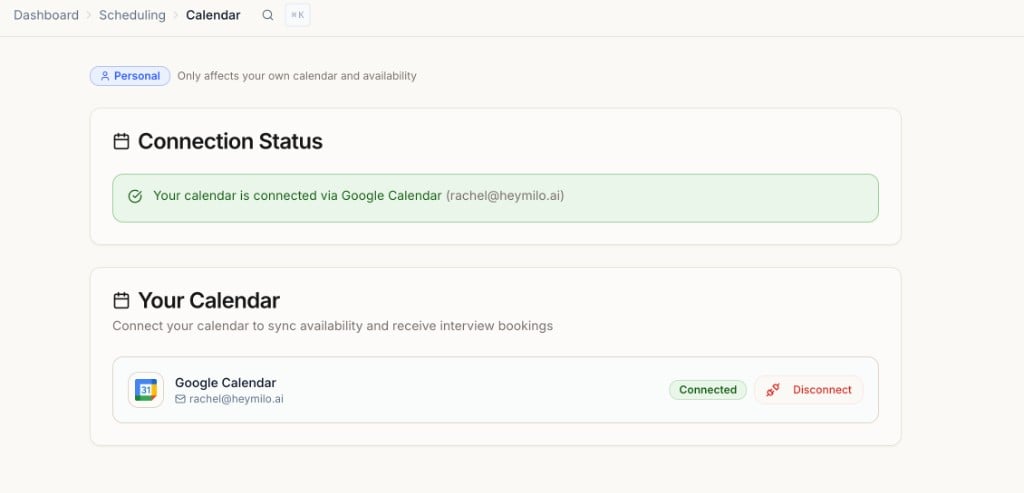
- Connect your calendar to sync availability and receive interview bookings
- Supported providers: Google, iCloud, Office 365, Exchange, Outlook.com
- Connection status shows at the top of the page once connected
You must connect a calendar before you can set availability or be added to interviews.
Availability
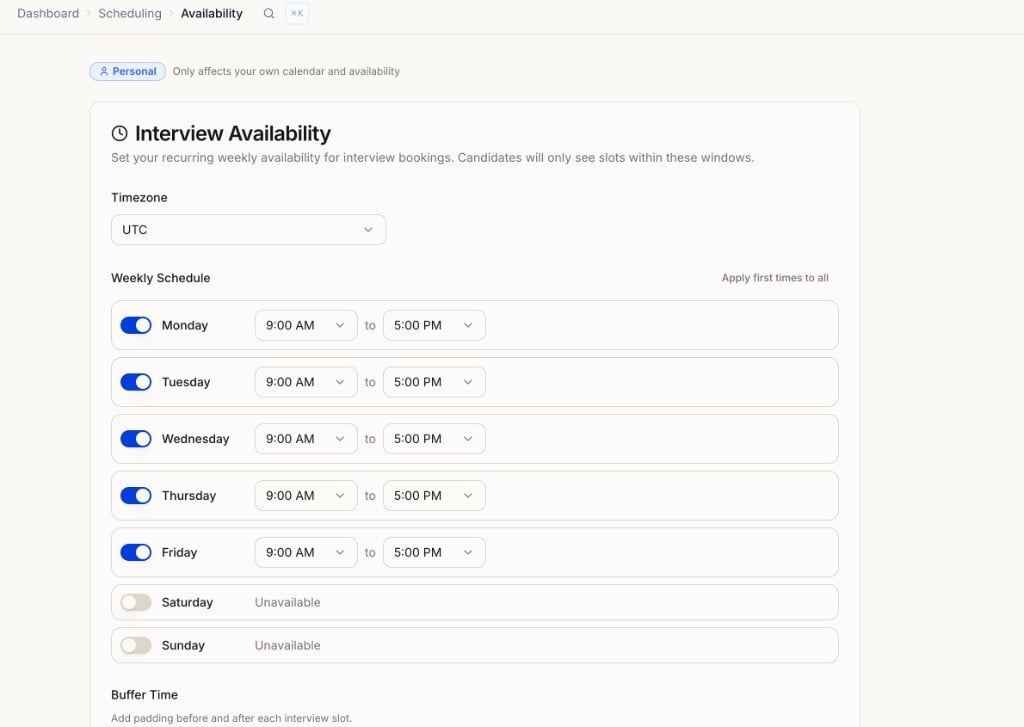
- Set your timezone (used to convert slots to the candidate’s timezone)
- Set your weekly schedule (recurring windows when candidates can book, e.g. Mon to Fri, 9:00 AM to 5:00 PM). Use Apply first times to all to fill the week quickly
- Mark days unavailable (e.g. weekends)
- Add buffer time before and after each interview slot
- Click Save Availability
Team Calendars
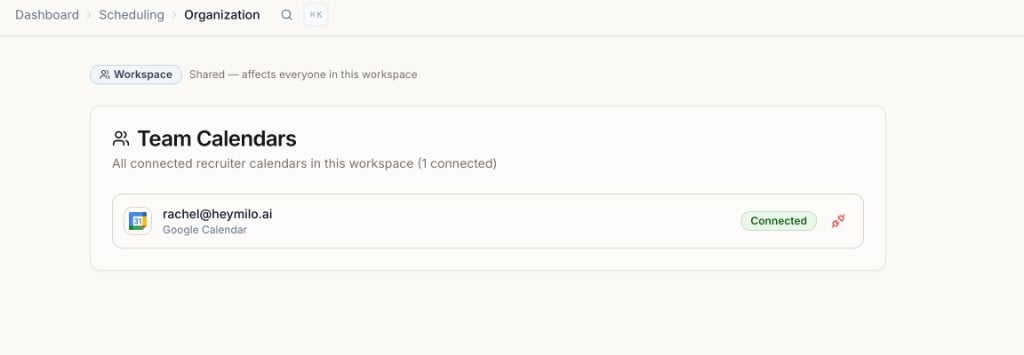
- Shows all connected recruiter calendars in the workspace
- Use this to confirm who on the team has connected before adding them to a scheduling template
Templates
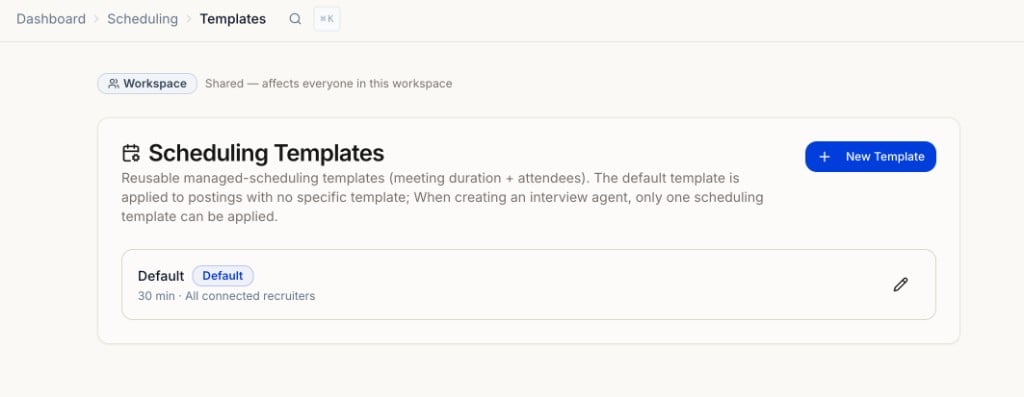
- Default template: 30 min, all connected recruiters. Applied to postings with no specific template
- New Template: opens a side drawer. Set a name, meeting duration (15 / 30 / 45 / 60 min), and who joins the call
- The person creating the template is selected by default. Everyone else is optional
- Only recruiters with the right permissions can add others to a template
- One scheduling template per interview agent
- Templates are reusable across multiple postings
Candidate experience
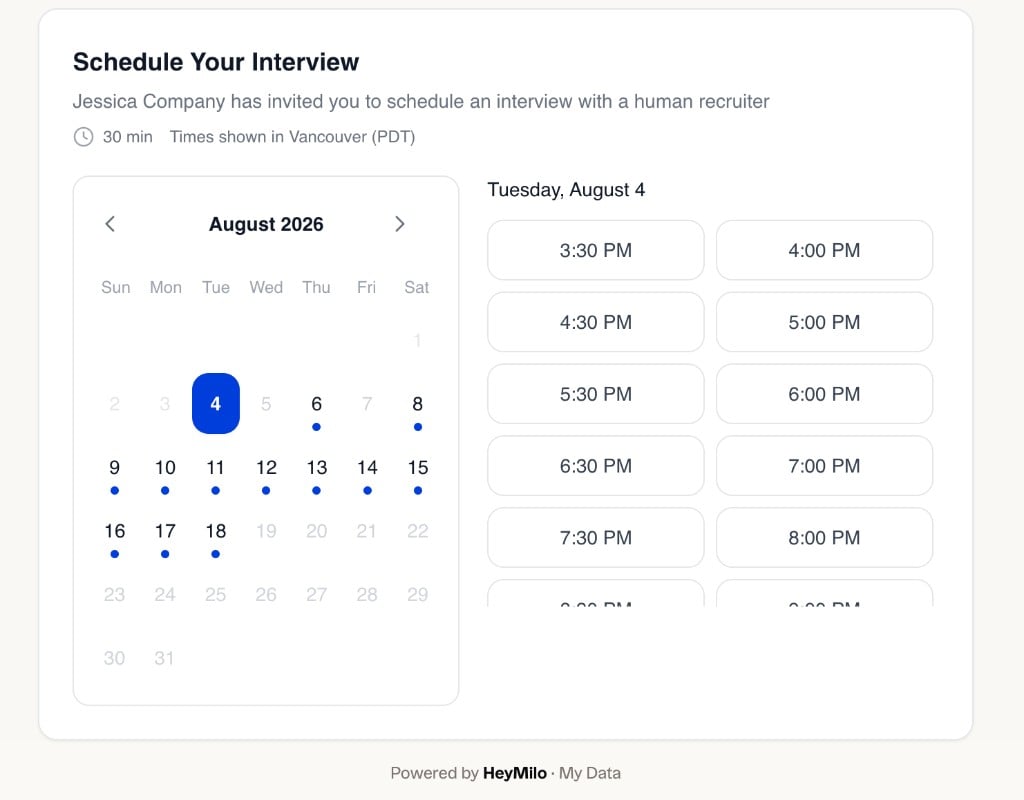
- Candidate finishes their interview and sees a scheduling page with available times (in their timezone)
- They pick a time and confirm
- They get a confirmation email where they can manage, reschedule, or cancel the booking
- The booking lands on the recruiter’s calendar
Recruiter experience
When creating a new interviewer agent, scroll down to Managed Scheduling and enable it: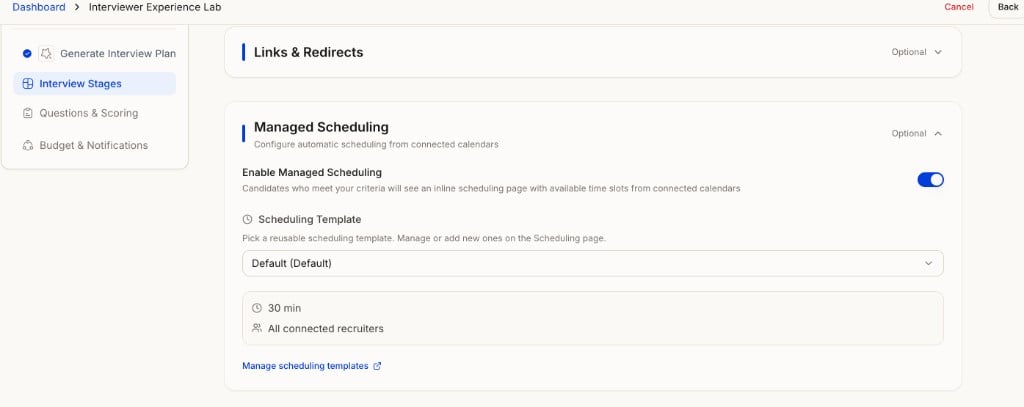
Notifications and emails
When a candidate books, reschedules, or cancels:- In-app notification: recruiters on the interview see it in their HeyMilo notifications
- Email: the same recruiters get an email with the booking details
- Only the people invited to that meeting are notified, not the whole workspace
- Calendar: the booking is automatically added, updated, or removed on your connected calendar
Scheduling tab on the candidate profile
Every candidate with a booking has a Scheduling tab on their profile: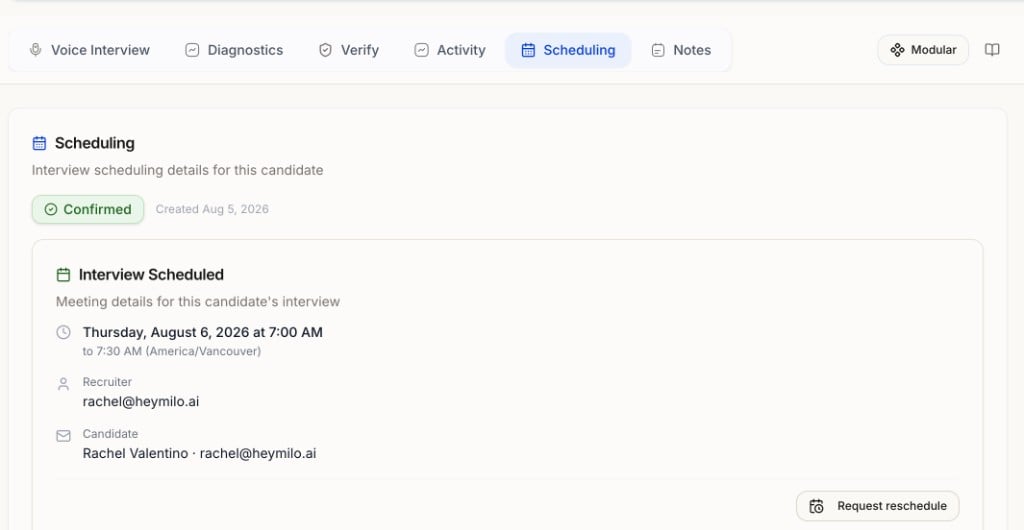
- See the booked time and its status (confirmed, rescheduled, cancelled)
- See who on the team is on the interview
Request a reschedule
If the booked time does not work for you:- Open the candidate profile → Scheduling tab
- Click Request reschedule
- The candidate gets an email to pick a new time
- The original booking stays until they confirm the new time
FAQs
Can each recruiter connect their own calendar?
Can each recruiter connect their own calendar?
Yes. Calendars and availability are personal. Templates and team calendars are workspace level.
Can different recruiters use different providers?
Can different recruiters use different providers?
Yes. One recruiter can use Google while another uses Office 365.
Can a manager set up scheduling for their team without being booked themselves?
Can a manager set up scheduling for their team without being booked themselves?
Yes. When creating a template, choose who joins the call. You do not need to include your own calendar.
What if a recruiter's calendar is always busy?
What if a recruiter's calendar is always busy?
Candidates only see slots where all required attendees are free. Keep calendars up to date so slots appear.
Who gets notified when a candidate books or reschedules?
Who gets notified when a candidate books or reschedules?
Only the recruiters invited to that meeting.
Can candidates reschedule on their own?
Can candidates reschedule on their own?
Yes. Their confirmation email includes manage, reschedule, and cancel options.
Can recruiters reschedule?
Can recruiters reschedule?
Yes. Use Request reschedule on the candidate profile. The old time holds until the candidate confirms a new one.
Where does scheduling happen in the workflow?
Where does scheduling happen in the workflow?
At the end, after all interview steps are complete.