1. Start from the dashboard
From the dashboard, click Create Interviewer to start a new interview experience.
2. Generate your interview plan
First, tell HeyMilo what role you’re hiring for so it can suggest an interview plan.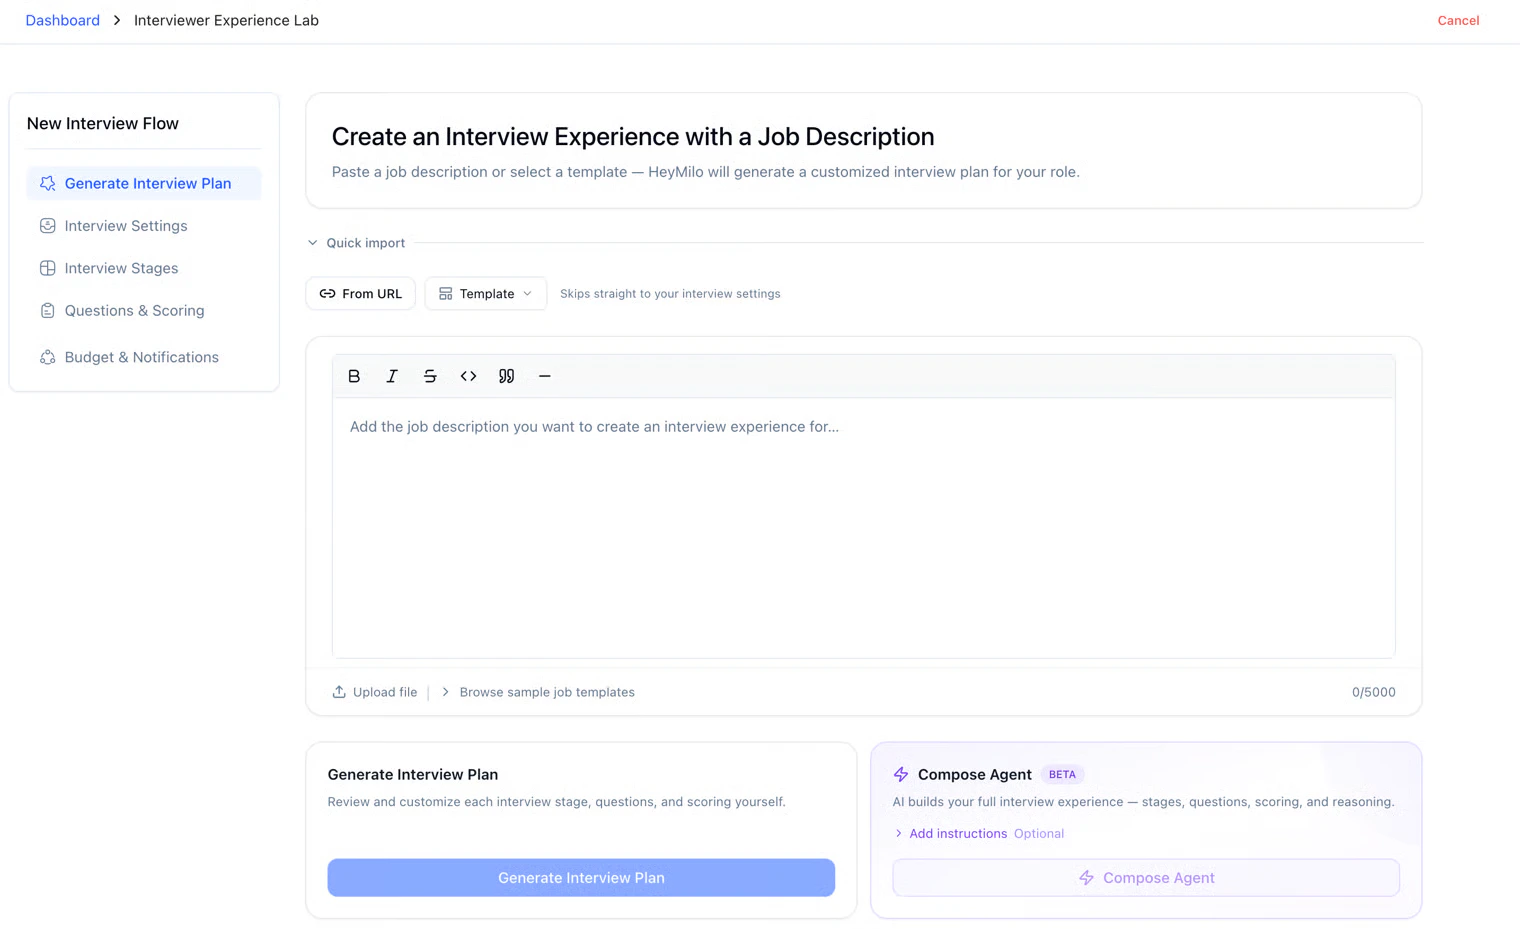
- Paste a job description — Paste your role description and HeyMilo will generate a customized interview plan.
- Use a template — Search job roles (e.g. Account Executive, Customer Support Representative) and pick a template to start from.
- Job posting URL (optional) — Enter a URL to pull the job description from a job posting page.
Compose Agent
Compose Agent is for when you want HeyMilo to generate the whole interviewer for you: which stages to use, the questions, the scoring, and how responses are evaluated.
- Templates — Pick a role template as a starting point when it fits.
- Add instructions — You can even say the flow you want in plain language (e.g. SMS → resume → voice).
- Paste context — Job copy, intake notes, or a meeting transcript so the draft matches how you actually run the screen.
3. Configure how it looks to candidates
Next you’ll see Configure: set how this interview appears to candidates.Interview URL
- Interview URL Name — This becomes part of the link you share (e.g.
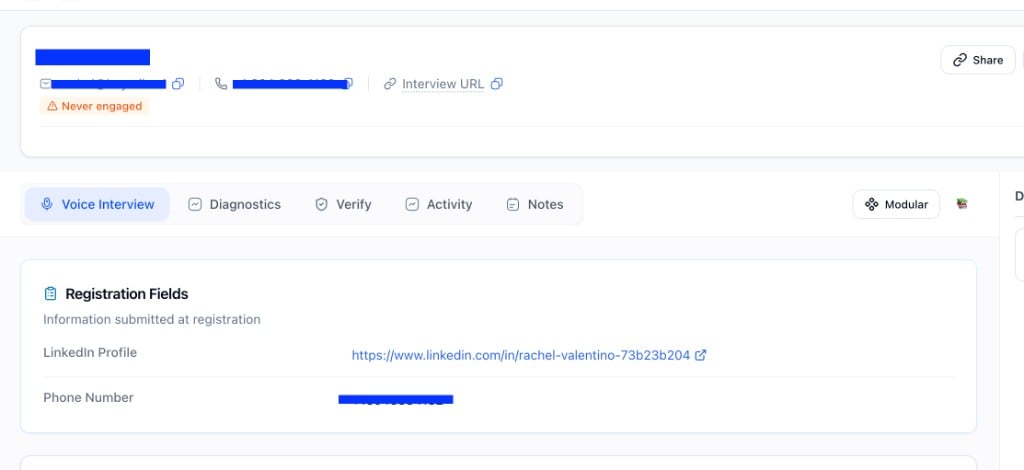
f8e-customer-support-specialist). You can keep the generated one or change it when creating the interviewer. After go-live, each candidate also gets a unique Interview URL on their profile (see Reviewing Candidates). - Position Title — The role title candidates see (e.g. “Customer Support Specialist”). Has a character limit.

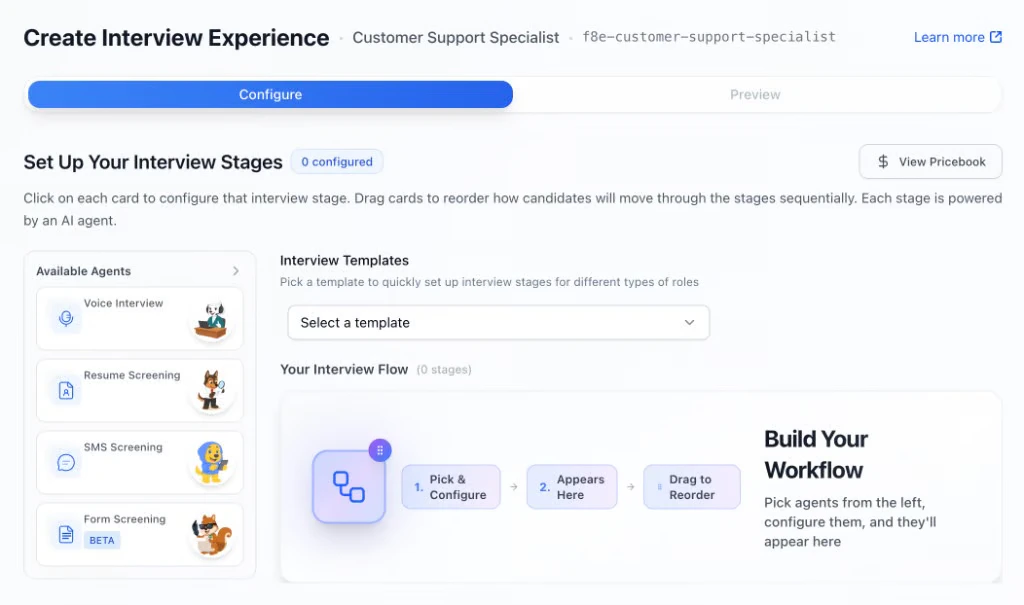
4. Set up your interview stages
Here you build the sequence of screening steps. Each step is an AI agent (voice interview, resume screening, SMS, or form).- Available Agents — Voice Interview, Resume Screening, SMS Screening, Form Screening, AI Scenario Assessment. Click a card to add and configure that stage.
- Your Interview Flow — Stages you add appear here. Drag to reorder how candidates move through them.
- Templates — Use “Select a template” to quickly set up stages for common role types.
5. Interview settings (optional)
Before you go live you can set:- Agent identity — Single identity (seamless) or multiple (handoff experience).
- Language — Default interviewer language or auto-detect candidate language (BETA).
- Timeline — Deadline and “days to complete” after a candidate is added.
- Retakes — Whether candidates can retake if they don’t pass.
- Communication & branding — Email template group, design template, phone number for SMS/voice, whether to email the report to the candidate, and candidate intake fields.
- Budget & notifications — Optional budget; email subscribers for completion alerts.
Candidate Intake Fields
If you want candidates to fill out specific fields before they start — like their LinkedIn profile, phone number, or earliest start date — use Candidate Intake Fields under Communication & Branding.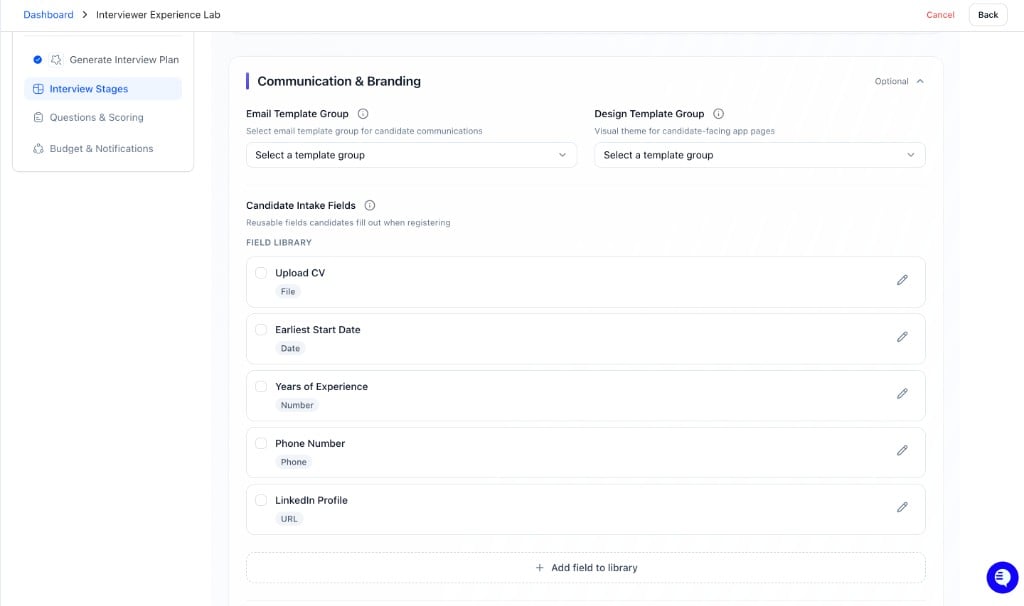
How budget enforcement works: Budget is checked when a new candidate is invited. Candidates already engaged in the flow won’t be cut off mid-experience (so their interview stays intact), which means actual spend can slightly exceed budget.Example: Import 1,000 candidates into an agent with a $10 budget → HeyMilo will engage all of them and exceed the cap, because they were already invited before it kicked in.Recommendation: Set a budget that matches the number of candidates you plan to move through the agent (per-candidate cost × planned volume + a small buffer).
Essential Settings
Under Essential Settings, configure how questions are generated for this experience:- Standard Generation (default) — Fast, independent per-modality generation. Each stage (voice, SMS, form, resume) generates questions separately using dedicated prompts.
- Adaptive Generation (BETA) — Agentic generation with cross-modality awareness. Questions are generated with intelligent reuse across stages, so the overall experience feels more cohesive.
Timeline & expiration
While creating the interviewer: Settings → Timeline & Completion. Set when the posting expires for new candidates and how many days to complete after someone starts. Later on the dashboard: Open the interviewer and check Deadline at the top. Edit here to extend dates or time to finish.
6. Questions & scoring
For each stage (e.g. Voice Interview), open Set Up Your Interview Questions.- Add questions — Your own, from the Question Library, or reuse from another interviewer. You can reorder and set how many follow-ups the AI can ask.
- Evaluation criteria — For each question, define what a strong vs weak answer looks like (rubric). Set a weight so more important questions count more toward the score.
- Enforce objective evaluation — Optional: require candidates to meet a minimum score to pass.

7. Share your interview
When setup is done, you’ll see Share with Candidates:- Interview link — Copy and share this link so candidates can start the interview. You can also print a poster.
- Connect to your ATS — Connect an ATS so candidates and results sync automatically. See ATS Integrations & quickstarts.
- Ingest — Use the webhook or ingestion gateway to send candidates from job boards, your site, or other tools.
Quick tips
- Clone to save time — Clone an existing interviewer from the dashboard to reuse stages, questions, and settings, then adjust. You can also use the Clone an interviewer API (Next Gen reference).
- Start simple — One voice or one SMS stage is enough to begin. Add more stages once you’re comfortable.
- Preview — Use Preview in the top nav to see how the interview looks to candidates before you share.
Next steps
- Interview Types — Voice, SMS, form, resume: when to use each
- Configuring Your AI Interviewer — Questions, rubrics, and settings in depth
- Inviting Candidates & Driving Completion — Get candidates to complete