> ## Documentation Index
> Fetch the complete documentation index at: https://docs.heymilo.ai/llms.txt
> Use this file to discover all available pages before exploring further.
> Interview Templates are reusable interview configurations. Use them so you don’t rebuild stages, questions, scoring, and defaults every time you open a similar role.
# Interview Templates
### Where to find them
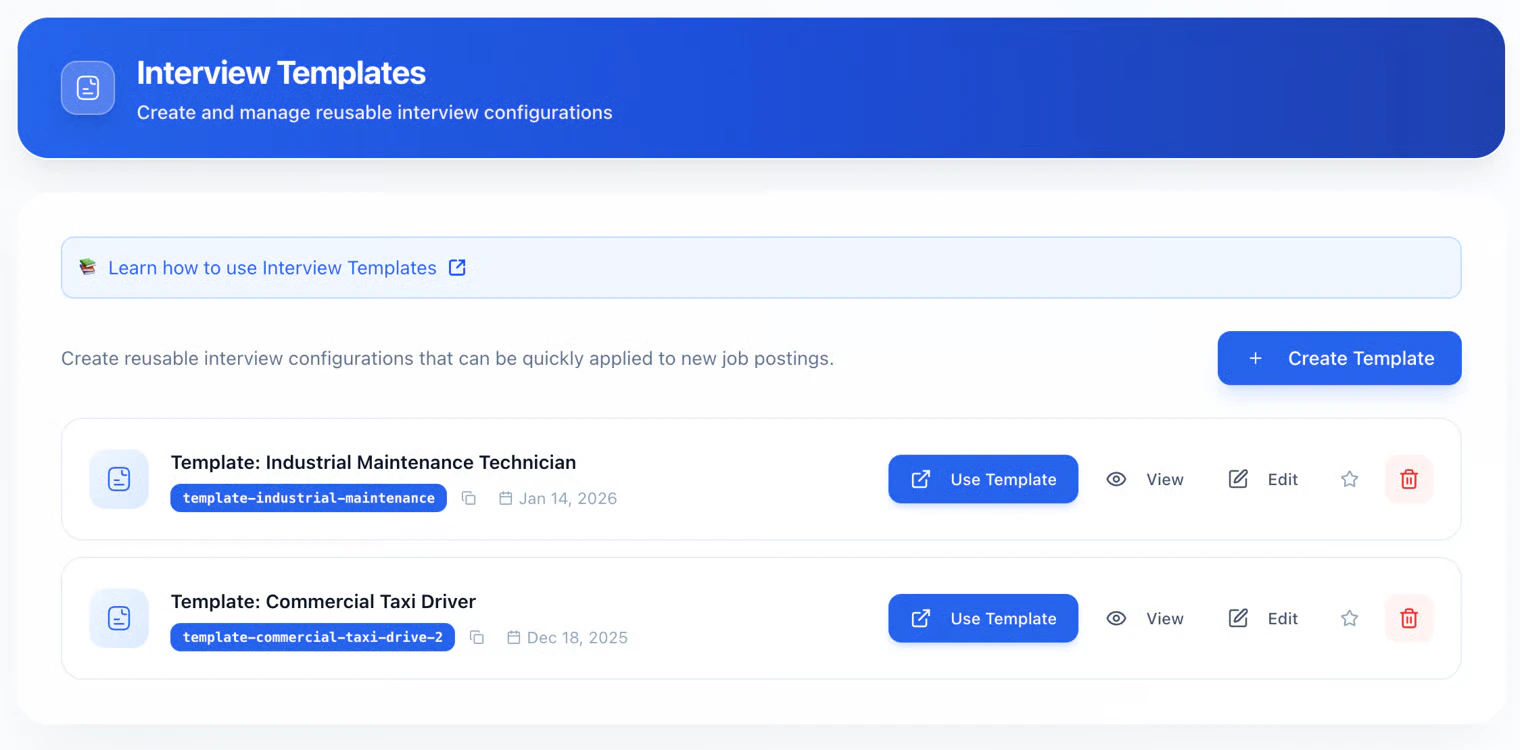
**Sidebar → Interviewers → Interview Templates** — create, set default, use, view, edit, delete.
 ### What a template includes
A template stores your interview setup, including:
* Interview **flow** (e.g. form, resume, SMS, voice)
* **Questions** and **scoring**
* **Qualification** rules and **tags**
* **Agent behavior** and related **settings** (e.g. budget where your product exposes it)
* **Evaluation** and **integrity** defaults
### Create a template
### What a template includes
A template stores your interview setup, including:
* Interview **flow** (e.g. form, resume, SMS, voice)
* **Questions** and **scoring**
* **Qualification** rules and **tags**
* **Agent behavior** and related **settings** (e.g. budget where your product exposes it)
* **Evaluation** and **integrity** defaults
### Create a template
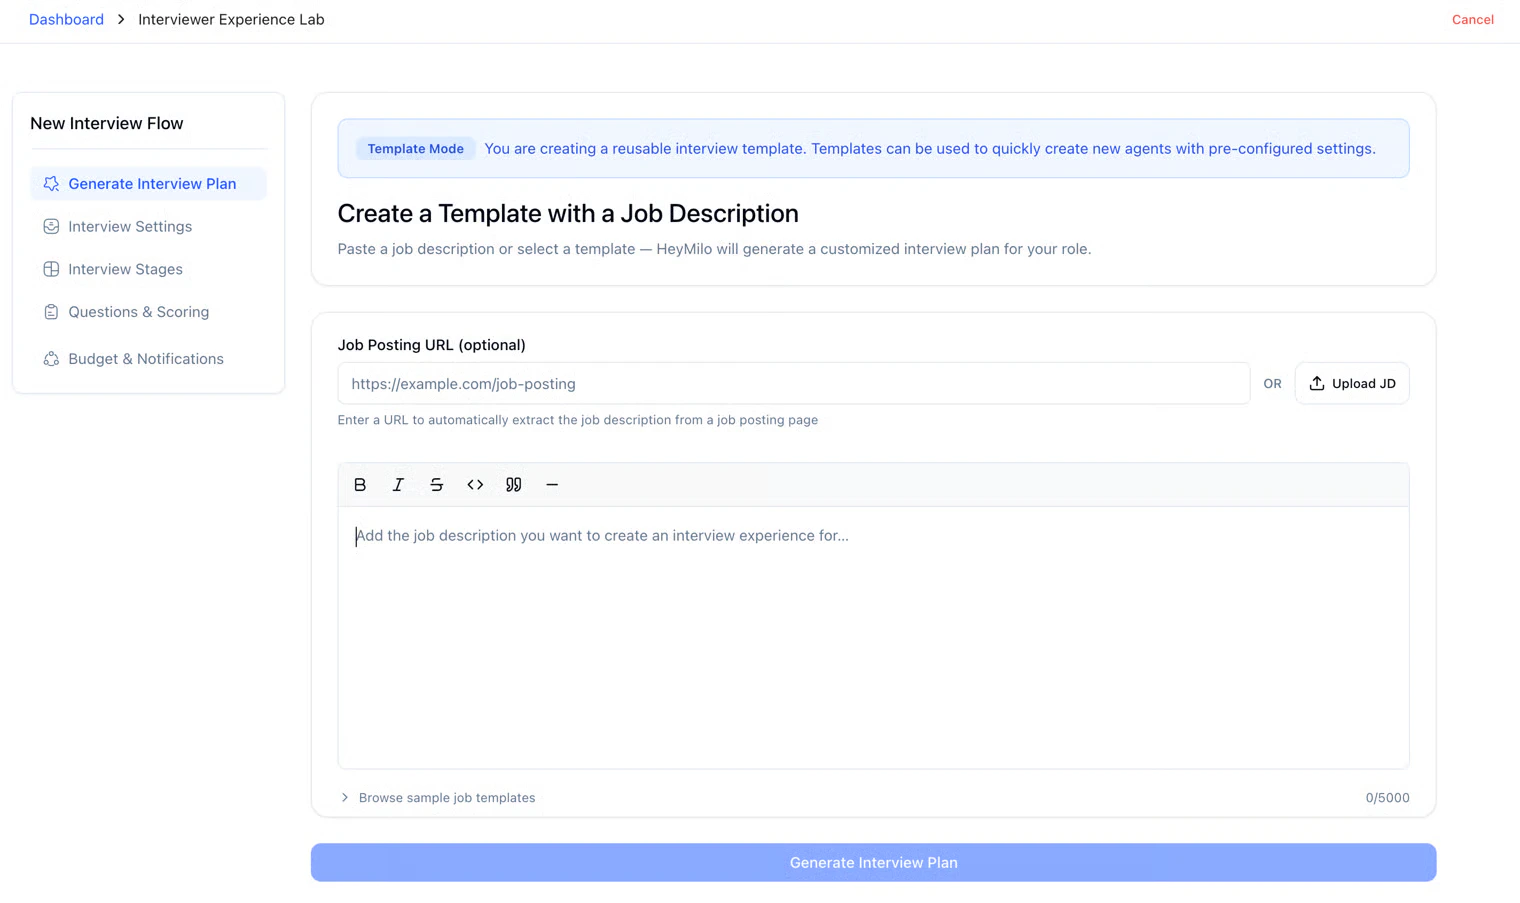 **From scratch**
1. **Interviewers** → **Interview Templates** → **Create Template**
2. Complete the configuration flow (same idea as building an interviewer)
3. Save — it’s stored as a template
**From an existing interviewer**
**From scratch**
1. **Interviewers** → **Interview Templates** → **Create Template**
2. Complete the configuration flow (same idea as building an interviewer)
3. Save — it’s stored as a template
**From an existing interviewer**
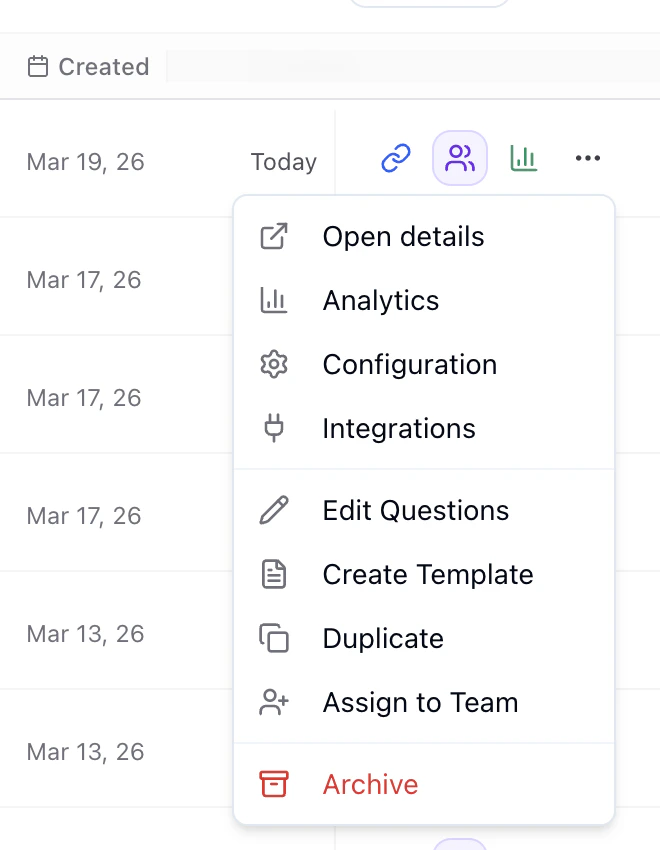 1. **Interviewers** → pick an agent with the setup you want
2. **Create Template** on that agent
3. That configuration is saved as a new template
### Default template
1. **Interviewers** → pick an agent with the setup you want
2. **Create Template** on that agent
3. That configuration is saved as a new template
### Default template
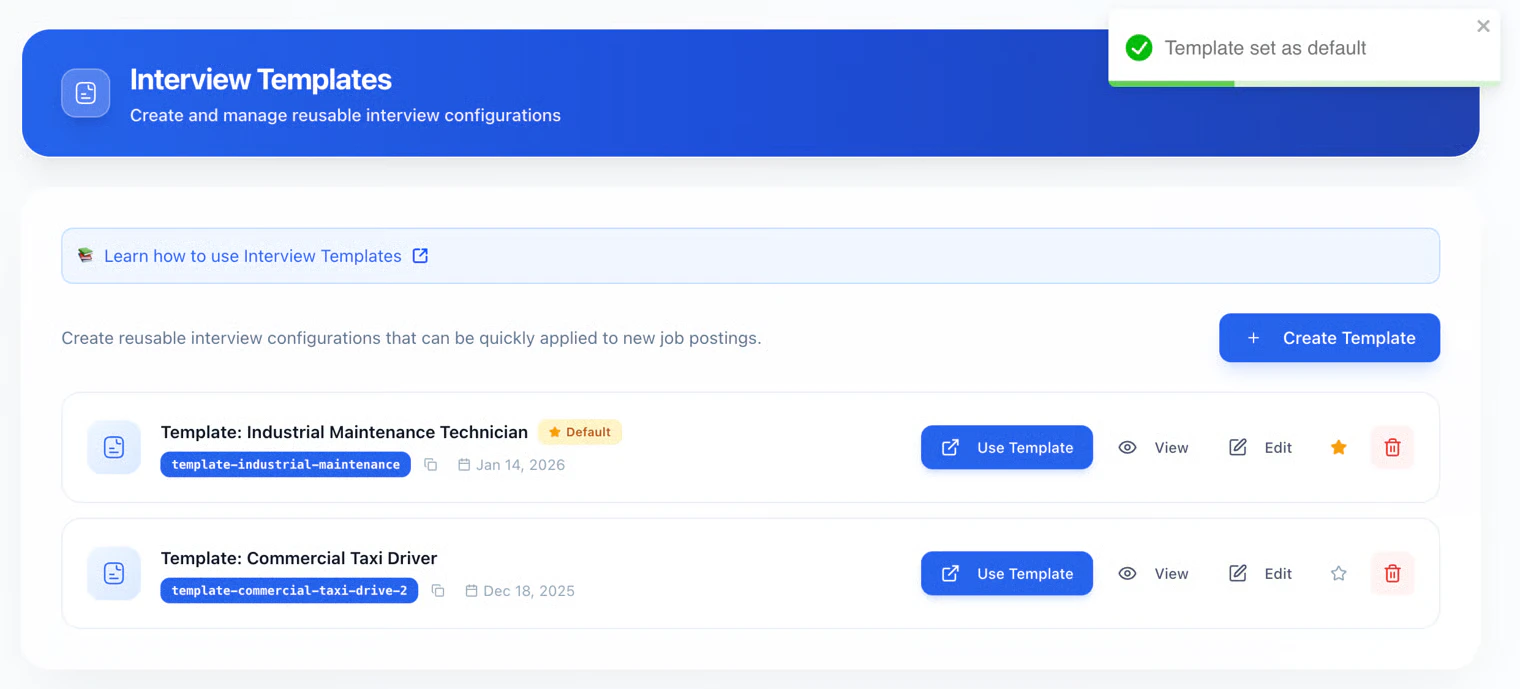 You can set **one** workspace **default** template (**star** on the template row).
* **New** interviewer creation from the main flow can **load** that template’s settings automatically.
* Only **one** default at a time; choosing a new one **clears** the previous.
* **Unset** by clicking the star again on the current default.
**Limits:** Auto-apply is for **new** creation paths — not every clone or edit flow. If there’s no default, you get the usual empty setup. You don’t need a default to use templates: **Use Template** works on any template.
### Use a template
1. **Interviewers → Interview Templates**
2. **Use Template** on the one you want
3. A **new agent** is created from that snapshot
4. Adjust job-specific details, then finalize and activate
**Snapshot rule:** The agent copies the template **at use time**. Later edits to the template **do not** change agents already created from it.
### Manage templates
You can set **one** workspace **default** template (**star** on the template row).
* **New** interviewer creation from the main flow can **load** that template’s settings automatically.
* Only **one** default at a time; choosing a new one **clears** the previous.
* **Unset** by clicking the star again on the current default.
**Limits:** Auto-apply is for **new** creation paths — not every clone or edit flow. If there’s no default, you get the usual empty setup. You don’t need a default to use templates: **Use Template** works on any template.
### Use a template
1. **Interviewers → Interview Templates**
2. **Use Template** on the one you want
3. A **new agent** is created from that snapshot
4. Adjust job-specific details, then finalize and activate
**Snapshot rule:** The agent copies the template **at use time**. Later edits to the template **do not** change agents already created from it.
### Manage templates
 Typical actions:
* **Use Template**: new agent from this template
* **View**: read-only full config
* **Edit**: change the template (**only affects future** agents created from it)
* **Star**: set / unset default
* **Delete**: **permanent**; agents **already** created from it keep working
Rename inline if your UI shows an edit control next to the name.
### Template codes
Each template has a **unique code** (e.g. for ATS/API, automation, or quick ID). Copy from the code badge in the UI when shown.
### Best practices
* Name by **role + channel + purpose**.
* Prefer a few **role-specific** templates over one vague catch-all.
* **Test** before making something the default.
* **Refresh** templates after hiring cycles so they match current standards.
### FAQ
* **Share across workspaces?** Templates are usually **workspace-only**; recreate elsewhere if needed.
* **How many templates?** Typically **no** practical cap — use what you need.
* **Duplicate a template?** **Use Template** → tweak → save as a **new** template (or equivalent) so you don’t overwrite the original.
### Next steps
* [Configuring Your AI Interviewer](../../getting-started/log-in/configuring-your-ai-interviewer)
* [Interview Evaluation](interview-evaluation)
* [AI Settings](.)
Typical actions:
* **Use Template**: new agent from this template
* **View**: read-only full config
* **Edit**: change the template (**only affects future** agents created from it)
* **Star**: set / unset default
* **Delete**: **permanent**; agents **already** created from it keep working
Rename inline if your UI shows an edit control next to the name.
### Template codes
Each template has a **unique code** (e.g. for ATS/API, automation, or quick ID). Copy from the code badge in the UI when shown.
### Best practices
* Name by **role + channel + purpose**.
* Prefer a few **role-specific** templates over one vague catch-all.
* **Test** before making something the default.
* **Refresh** templates after hiring cycles so they match current standards.
### FAQ
* **Share across workspaces?** Templates are usually **workspace-only**; recreate elsewhere if needed.
* **How many templates?** Typically **no** practical cap — use what you need.
* **Duplicate a template?** **Use Template** → tweak → save as a **new** template (or equivalent) so you don’t overwrite the original.
### Next steps
* [Configuring Your AI Interviewer](../../getting-started/log-in/configuring-your-ai-interviewer)
* [Interview Evaluation](interview-evaluation)
* [AI Settings](.)