> ## Documentation Index
> Fetch the complete documentation index at: https://docs.heymilo.ai/llms.txt
> Use this file to discover all available pages before exploring further.
> Add team members to your HeyMilo account and control what each person can access and do.
# Team & Roles
### How to Add a Teammate
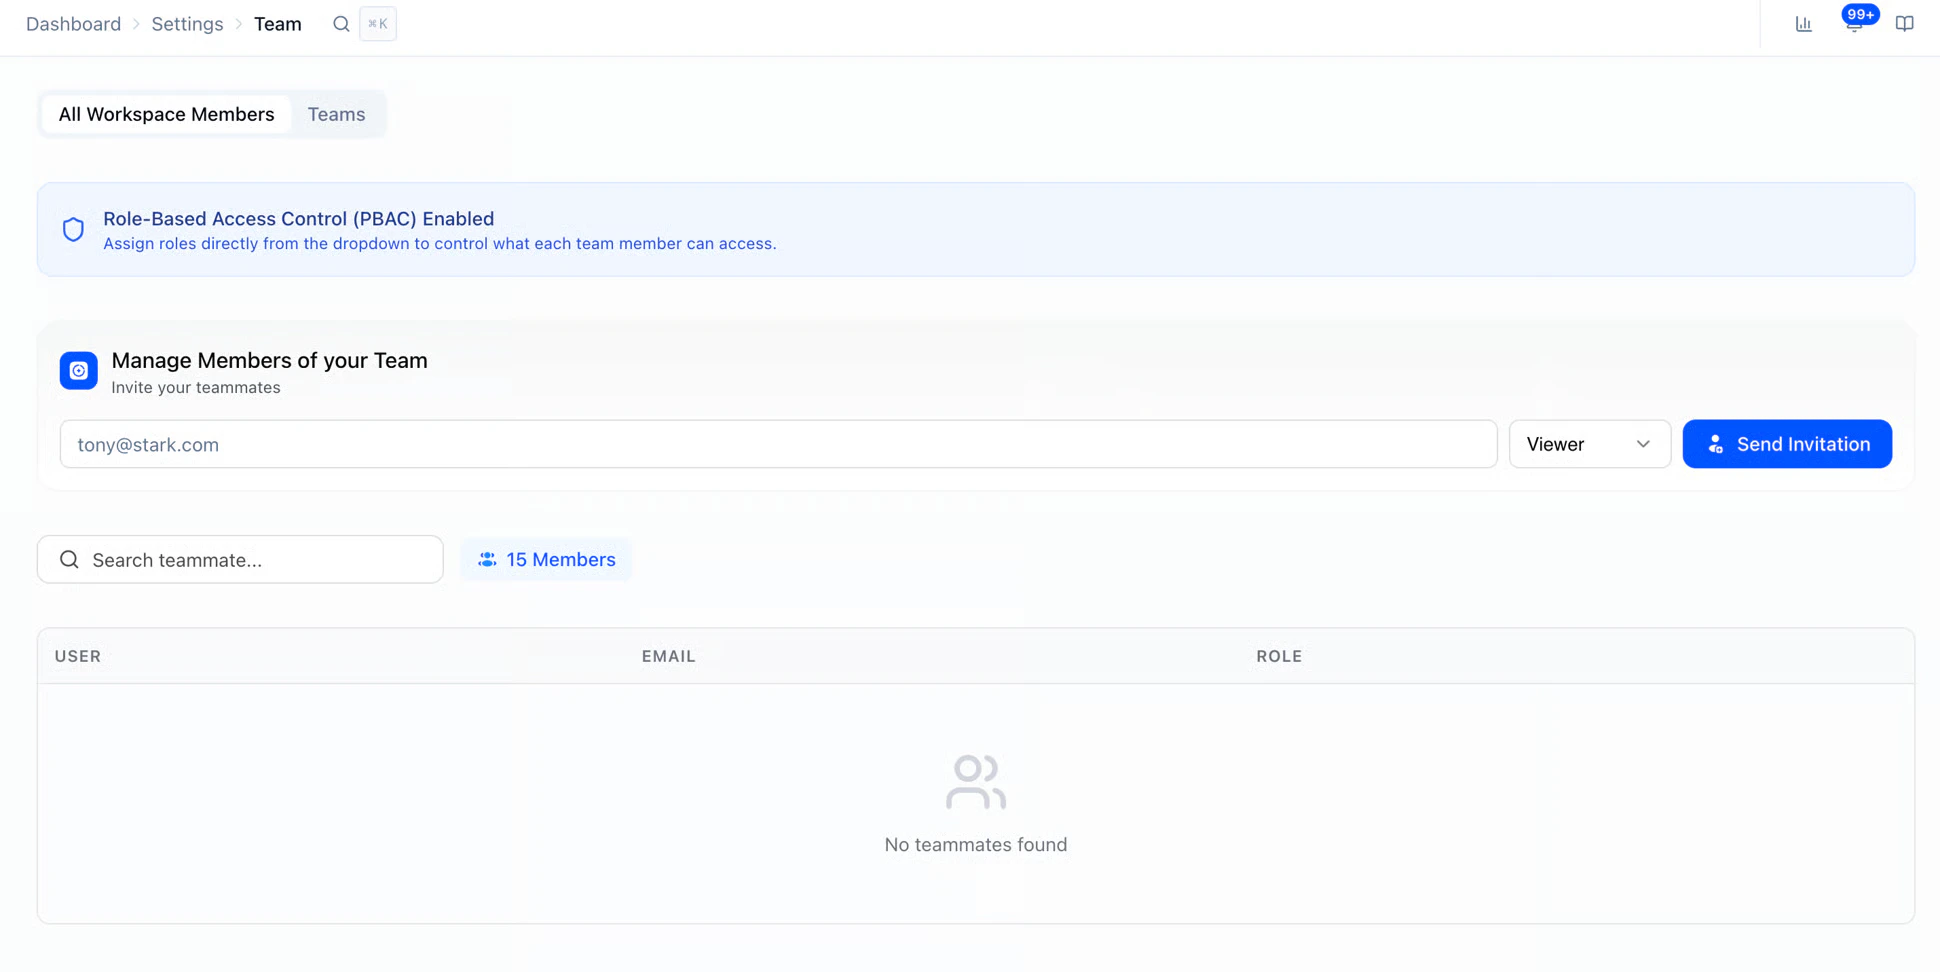 * The invited user will receive an email to join your workspace. Until they accept, they'll appear as "Pending Invite."
### **Teams**
Once your workspace has a few members, you can group them into **Teams** so the right people see the right postings. Useful for orgs split by region, division, or function.
* The invited user will receive an email to join your workspace. Until they accept, they'll appear as "Pending Invite."
### **Teams**
Once your workspace has a few members, you can group them into **Teams** so the right people see the right postings. Useful for orgs split by region, division, or function.
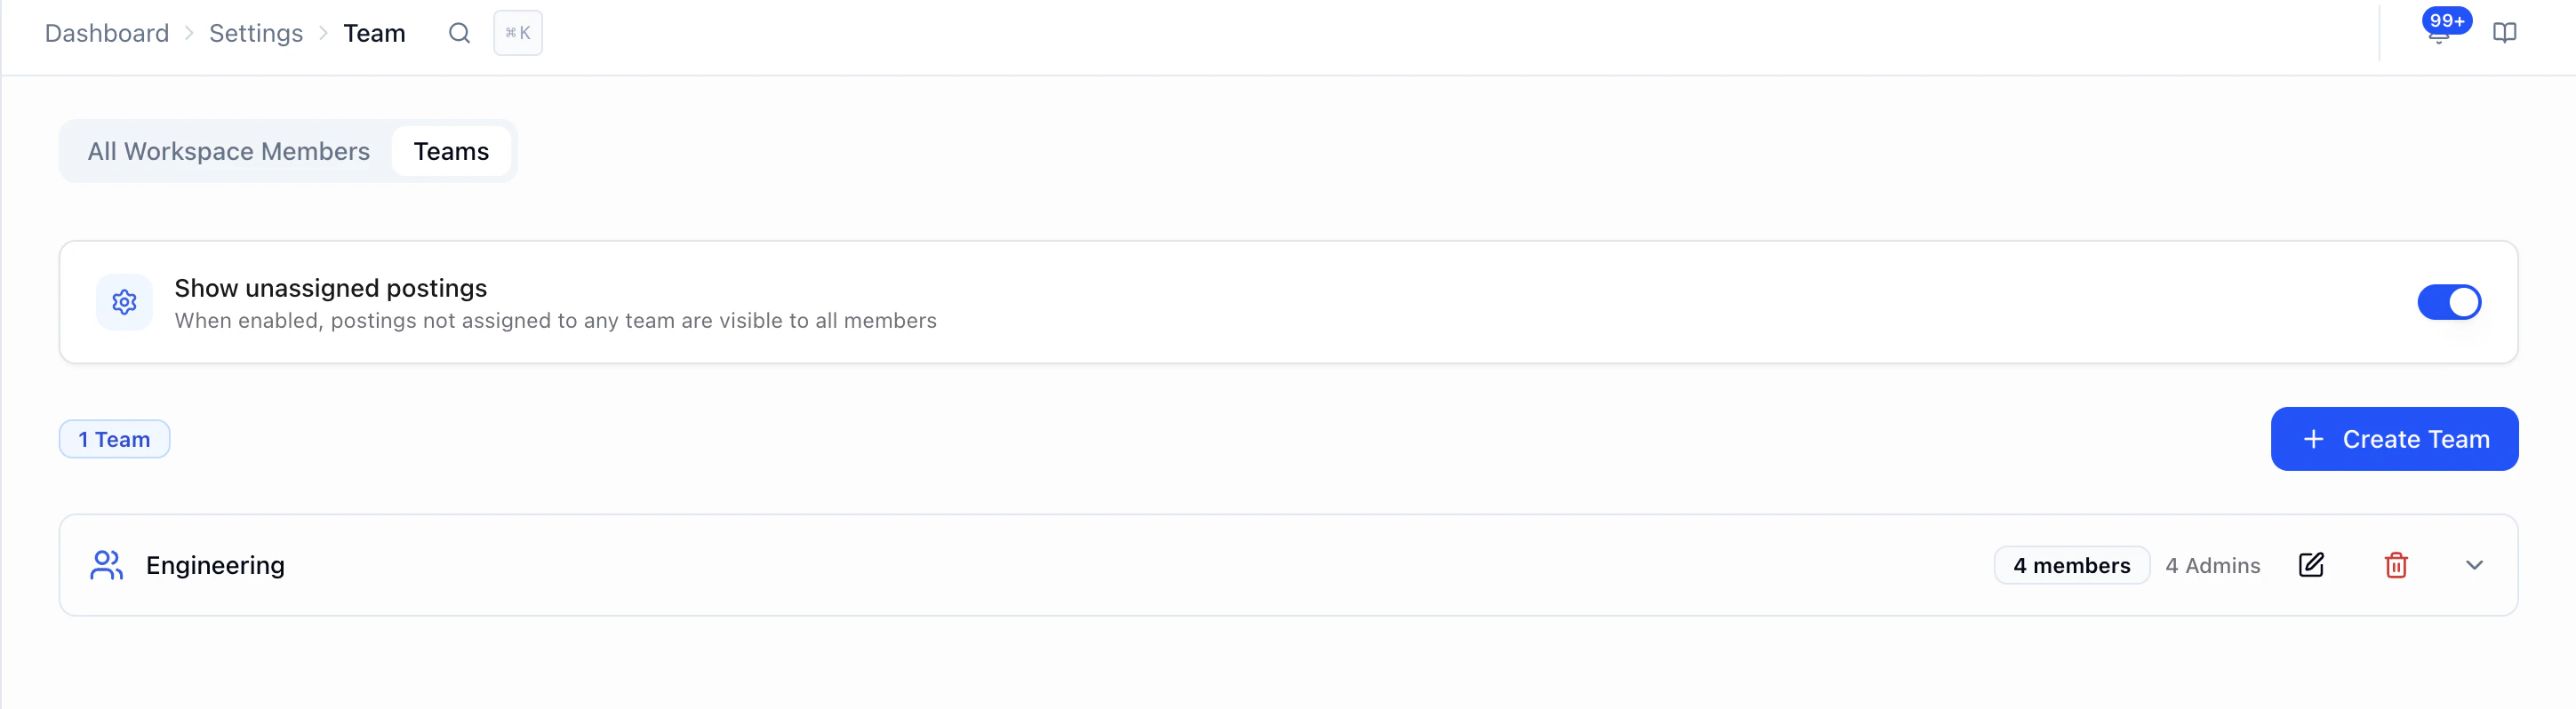 **Where to find it:** Go to **Settings → Team → Teams** tab.
**What you can do here:**
* **Create a Team**: click **+ Create Team** and name it (e.g. *Americas TA*, *EMEA Recruiting*, *Tech Hiring*).
* **Assign members**: add Admins, Recruiters, and Viewers to the team. Each member's role still controls *what they can do*; the team controls *what they can see*.
* **Show unassigned postings**: toggle this on if you want postings that aren't tied to any team to stay visible to all members. Toggle off to keep unassigned postings hidden from team members.
* **Edit or remove a Team**: use the pencil icon to rename or update members, or the trash icon to delete.
**Heads-up:** A user can belong to more than one Team, and they'll see all postings assigned to any team they're part of.
### Roles & Permissions
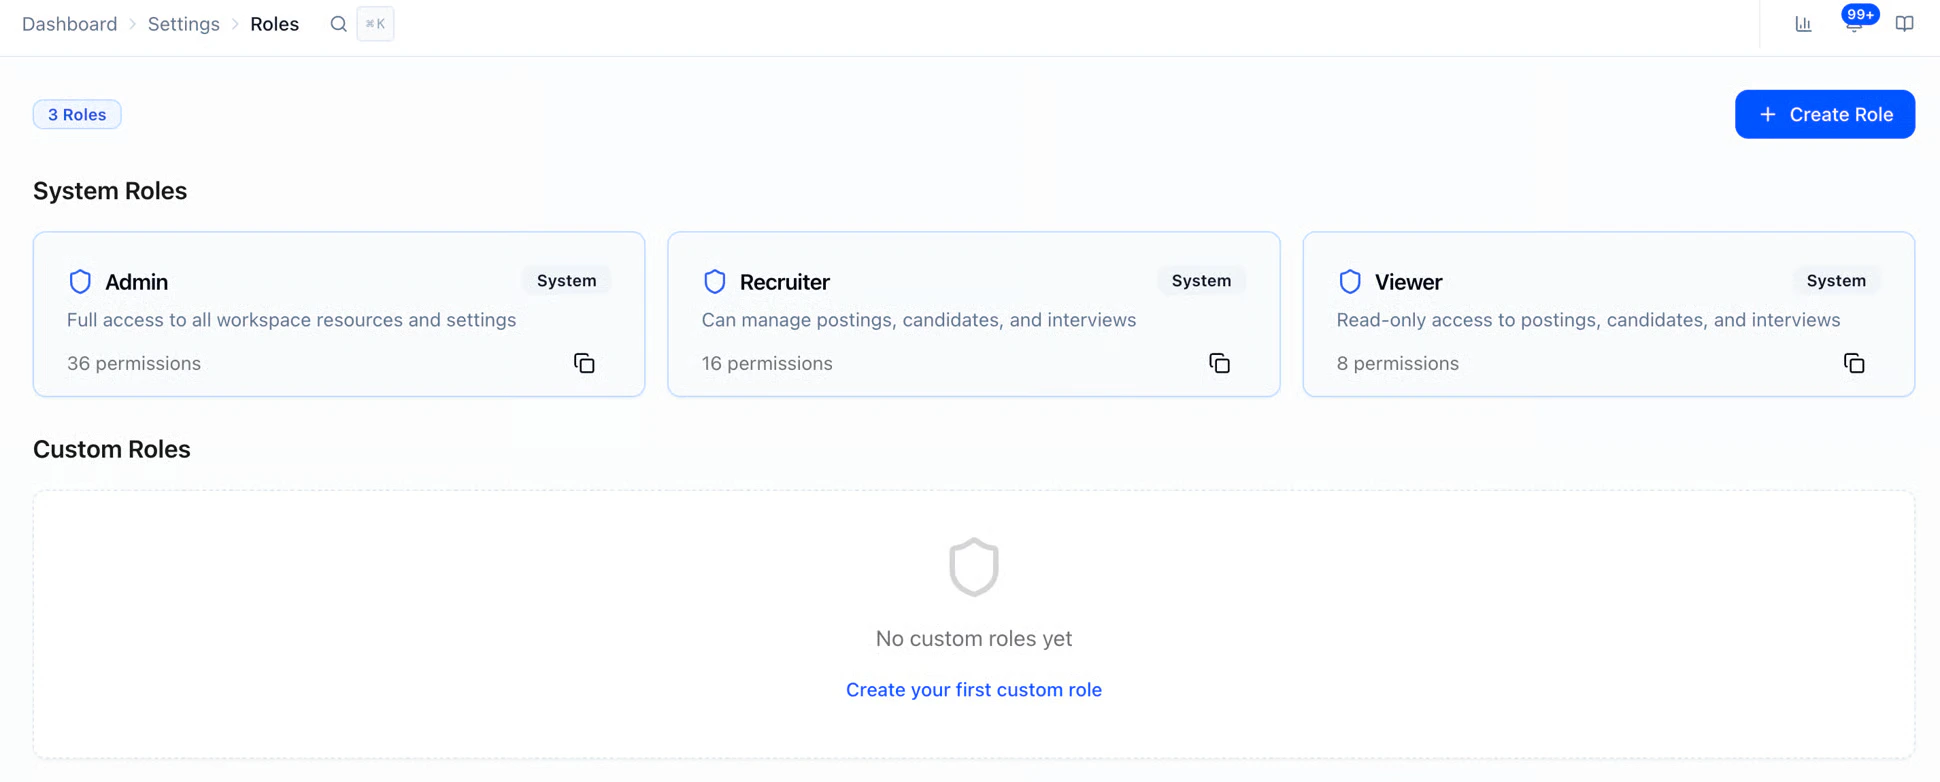
HeyMilo offers three system roles, plus the ability to create custom roles.
**System Roles**
| Role | Read | Write/Edit | Delete |
| ------------- | ---- | ---------- | ------ |
| **Admin** | ✅ | ✅ | ✅ |
| **Recruiter** | ✅ | ✅ | ❌ |
| **Viewer** | ✅ | ❌ | ❌ |
**Where to find it:** Go to **Settings → Team → Teams** tab.
**What you can do here:**
* **Create a Team**: click **+ Create Team** and name it (e.g. *Americas TA*, *EMEA Recruiting*, *Tech Hiring*).
* **Assign members**: add Admins, Recruiters, and Viewers to the team. Each member's role still controls *what they can do*; the team controls *what they can see*.
* **Show unassigned postings**: toggle this on if you want postings that aren't tied to any team to stay visible to all members. Toggle off to keep unassigned postings hidden from team members.
* **Edit or remove a Team**: use the pencil icon to rename or update members, or the trash icon to delete.
**Heads-up:** A user can belong to more than one Team, and they'll see all postings assigned to any team they're part of.
### Roles & Permissions
HeyMilo offers three system roles, plus the ability to create custom roles.
**System Roles**
| Role | Read | Write/Edit | Delete |
| ------------- | ---- | ---------- | ------ |
| **Admin** | ✅ | ✅ | ✅ |
| **Recruiter** | ✅ | ✅ | ❌ |
| **Viewer** | ✅ | ❌ | ❌ |
Admin
Full access to the workspace. Can create, edit, and delete interviews, templates, candidates, and settings.
Recruiter
Can view and edit everything, but cannot delete. Great for team members who need to work with candidates and interviews without the risk of accidental deletions.
Viewer
Read-only access. Can view interviews, candidates, and templates but cannot make any changes. Perfect for stakeholders who need visibility without edit access.
Custom Roles
Need more flexibility? Create your own custom roles with granular permissions. When building a custom role, you can control access across these categories:
* **Postings:** Read (view agents) and Write (create, edit, archive agents)
* **Candidates:** Read (view profiles), Write (nudge, shortlist, dismiss), and Delete (remove candidates)
* **Integrations:** Read (view ATS and API configurations)
* **Team:** Read (view teammates and roles)
* **Billing:** Read (view plans, invoices, and usage)
Mix and match permissions to create roles that fit your team's structure, like a "Hiring Manager" who can view candidates and scorecards but can't change agent settings.
### How to Set Up Custom Roles
Go to Settings → Roles
 Name your role and configure permissions
* You can then assign this custom role to any teammate from the Team page.
### Managing Teammates
Name your role and configure permissions
* You can then assign this custom role to any teammate from the Team page.
### Managing Teammates
Change a Teammate's Role
* Go to **Settings → Team**
* Find the teammate
* Click the role dropdown next to their name
* Select the new role
Remove a Teammate
* Go to **Settings → Team**
* Click the **⋮** menu next to the teammate
* Select **Remove from Workspace**
Resend an Invite
If someone hasn't accepted their invite:
1. Go to **Settings → Team**
2. Find the pending invite
3. Click the **⋮** menu
4. Select **Resend Invite**
### Enabling PBAC for Your Workspace
Permissions-Based Access Control (PBAC) must be enabled for your workspace by HeyMilo. Contact your CSM or support to turn on this feature.
Once enabled, refresh your browser to see the new role options.
### Teams in Your Workspace
You can create teams within your workspace to organize postings by department, location, or brand.

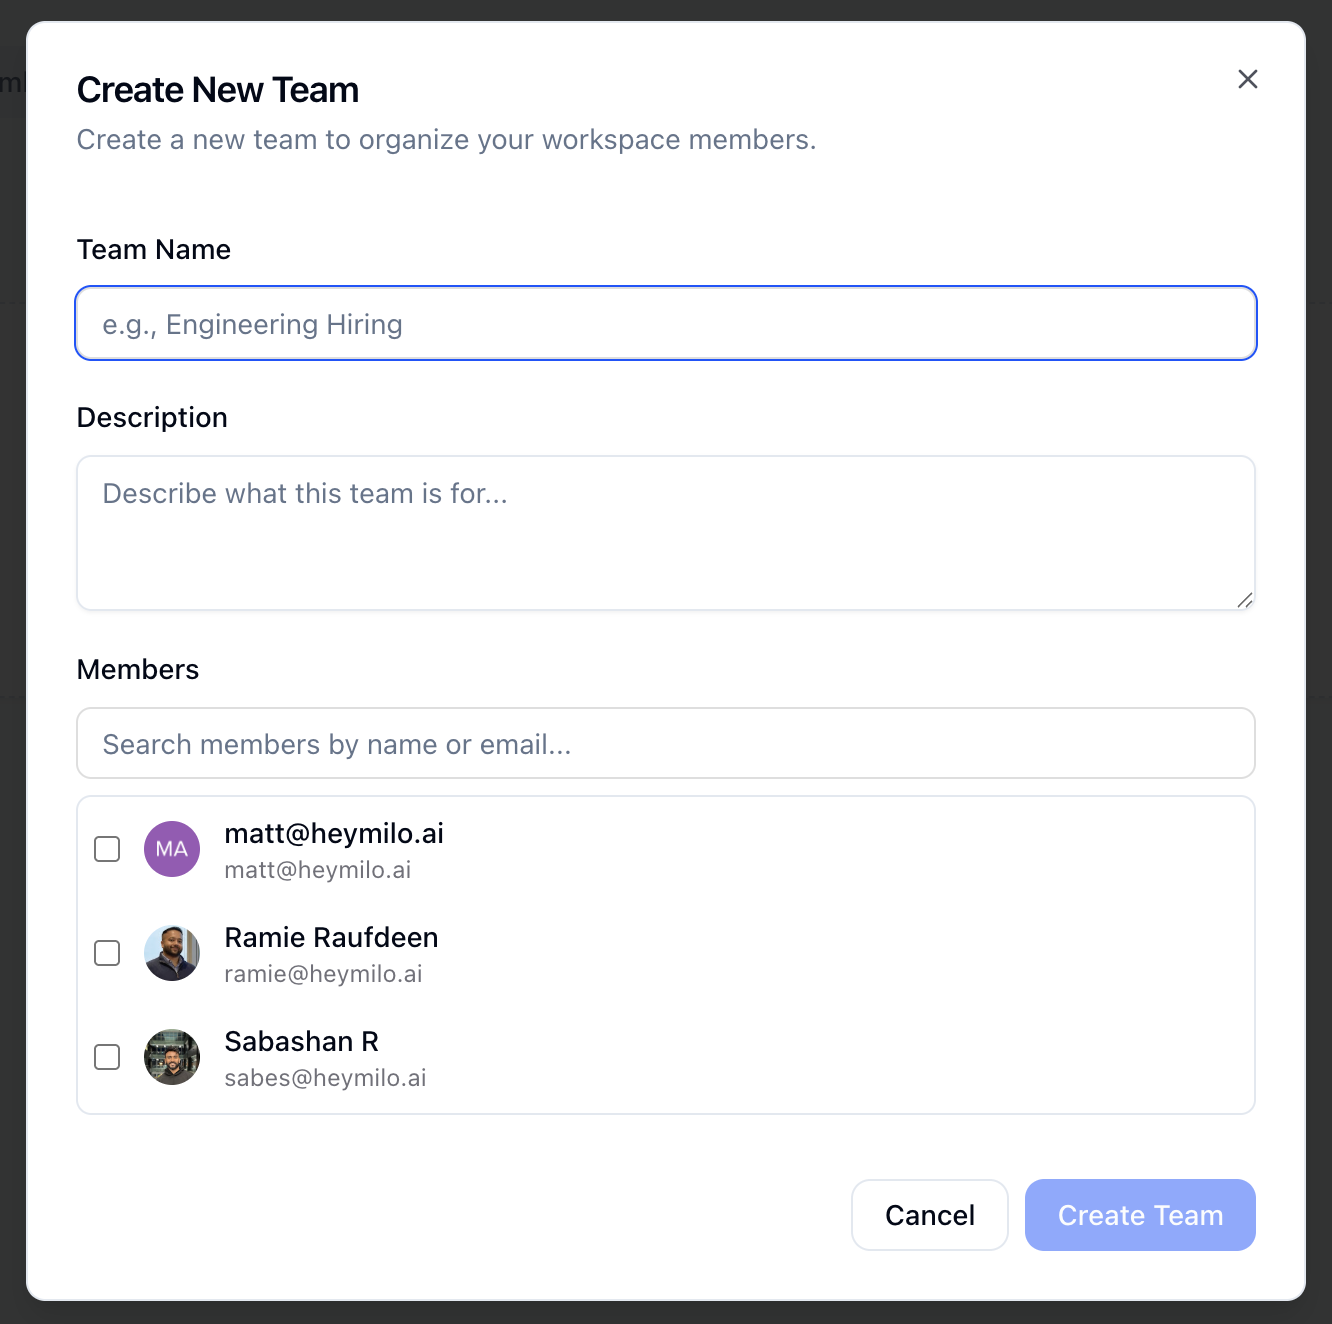 * Optionally add a quick description so members know what the team is for
**Agents and team space**
Switch between teams at the top of your workspace.
* Optionally add a quick description so members know what the team is for
**Agents and team space**
Switch between teams at the top of your workspace.
 * When you create an agent, it is created in the team space you’re currently in (or the team you have selected). That agent then “lives” in that team and is visible to others based on team membership and permissions.
* Agents are scoped to one team at a time.
* When you create an agent, it is created in the team space you’re currently in (or the team you have selected). That agent then “lives” in that team and is visible to others based on team membership and permissions.
* Agents are scoped to one team at a time.
How permissions work with teams
* Role-based permissions (Admin, Recruiter, Viewer, or custom roles) apply in the context of teams. When you update a user’s role or permissions at the workspace level, those changes are reflected for that user across the teams they belong to.
* Teammates see and can act on agents according to their role and which team(s) they’re in.
Transferring an agent to another team
You can move an existing interview agent from one team to another without recreating it: open the agent, use **Actions**, and **Assign to team**.
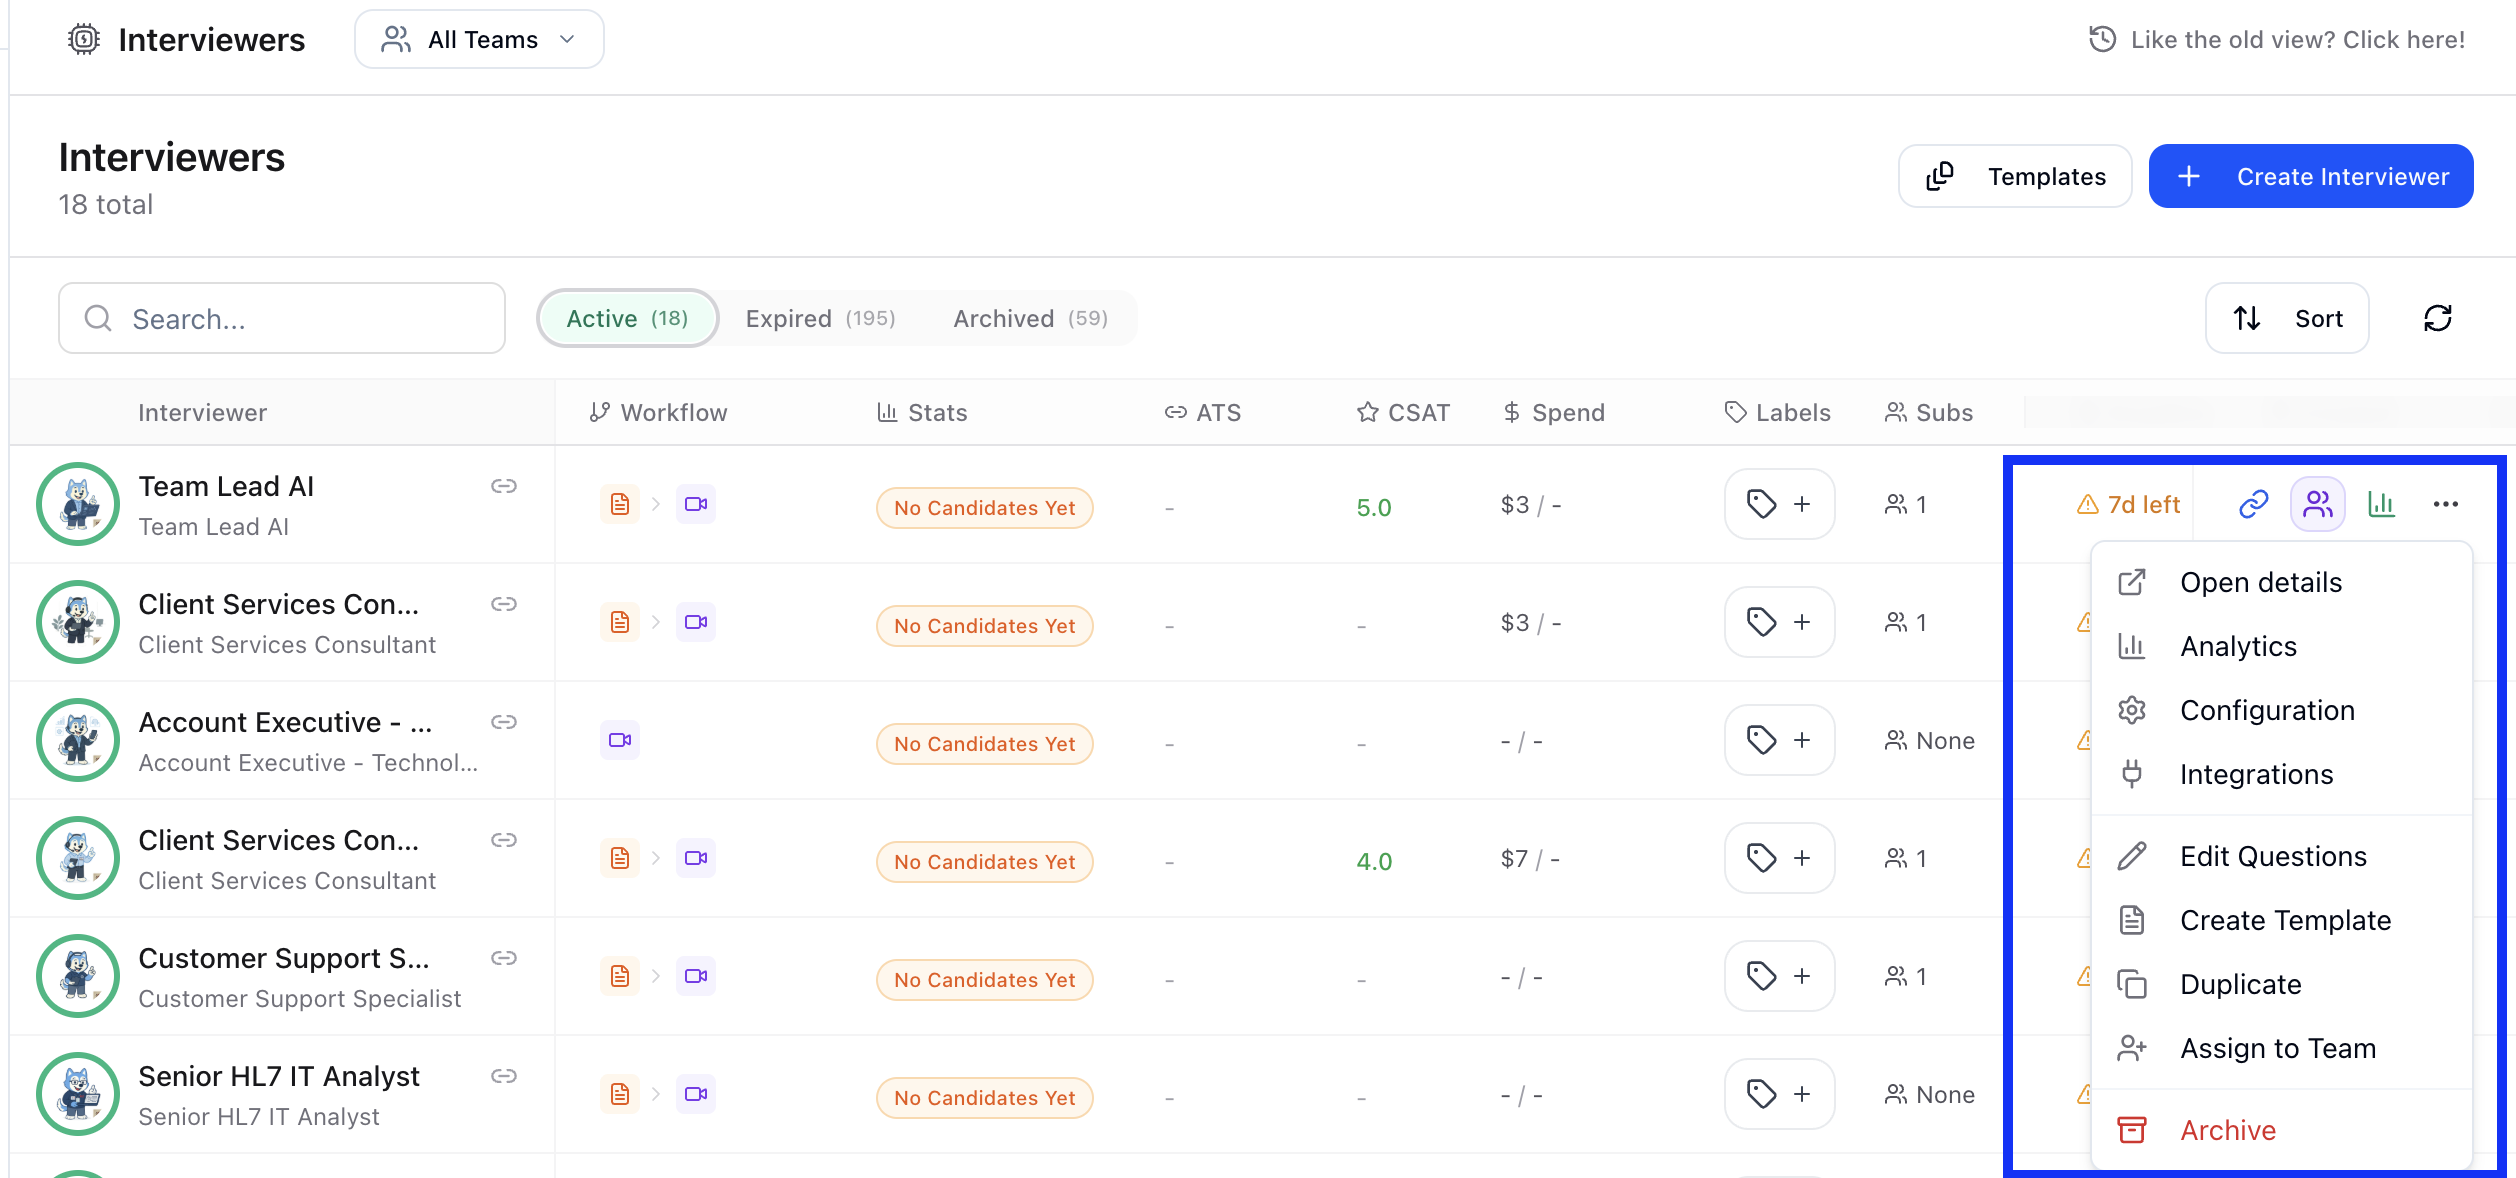 * Select the destination team and confirm. The agent will appear in the new team’s space; candidates and data stay with the agent.