> ## Documentation Index
> Fetch the complete documentation index at: https://docs.heymilo.ai/llms.txt
> Use this file to discover all available pages before exploring further.
> Automate end-to-end candidate engagement, conversational screening, and evaluation directly in Tracker!
# Tracker
HeyMilo pulls candidates from the job stages you select, runs your configured AI workflow (SMS, resume, form or voice interview), and writes the completed results back into Tracker.
### Setting Up the Integration
Watch the video and follow the steps below to connect HeyMilo with Tracker:
#### 🛠 What You’ll Need
Before you begin, make sure you have:
* Tracker **access token** (bearer token)
* Your Tracker **region**: US, CA, or Other
* Admin access to your HeyMilo workspace
### Connect HeyMilo to Tracker
* On the side bar, click **Integrations** and select **Tracker**.

You will be asked for:
* **Access Token (Bearer Token)**
* **API Version** (defaults to 1)
* **Region** (US, CA, or Other)
Where to find the Access Token
Log into Tracker. Click your **Profile Icon** → **Tools & Settings.** Go to **Security → Security Settings → API.** Copy the **Access Token.** Paste it into HeyMilo.
* You’ll see a confirmation when the integration is successfully activated!
### Create or Select a Job in Tracker
Create a Tracker job or open an existing one.
1. Copy the Job Posting ID
* You can find it in the URL:

Example
```
### Map Your Jobs to a HeyMilo Agent
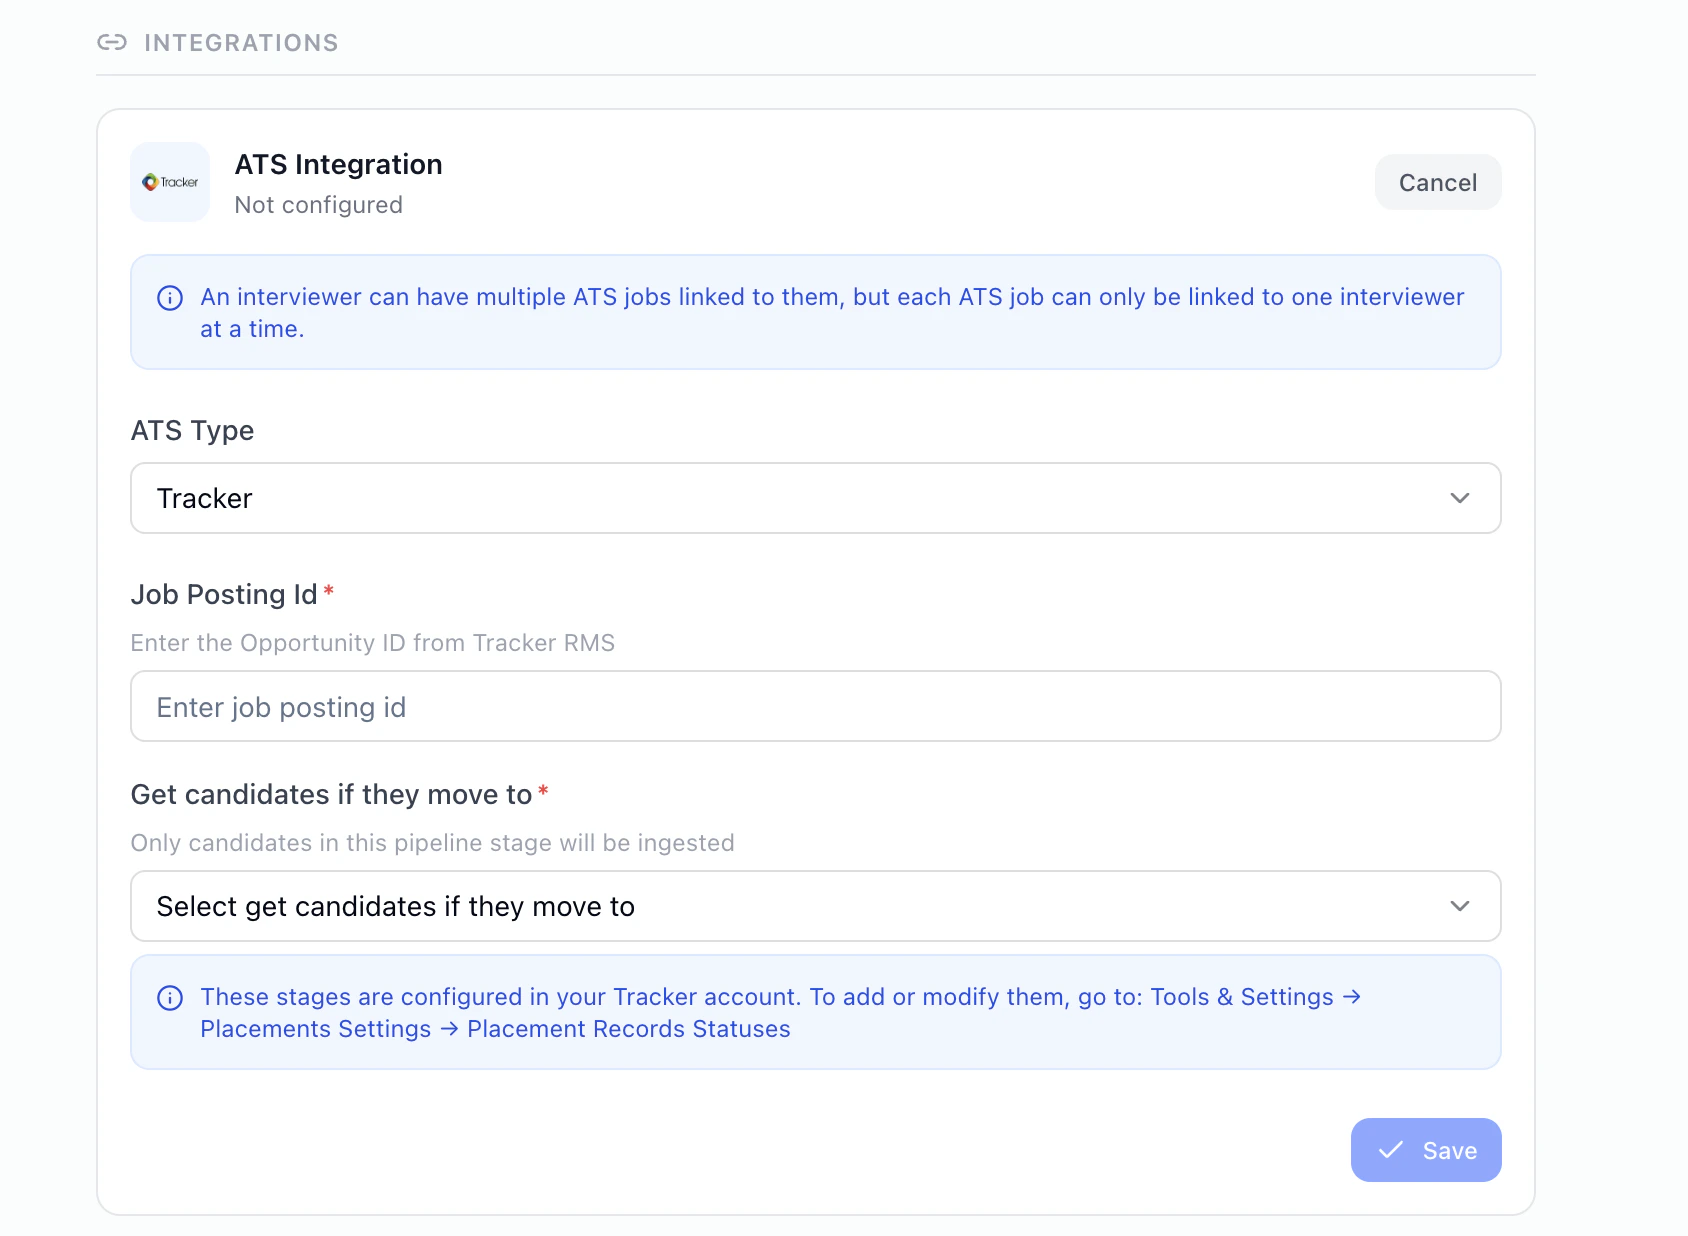
* Go to the agent → **Actions → Integrations**
 Select:
* **ATS Type:** Tracker
* **Paste your Tracker Job ID**
This dropdown controls **which Tracker stage triggers HeyMilo screening**.
Important clarification: Tracker groups its internal stages under broad categories. HeyMilo shows a detailed dropdown representing those categories. If you see options in HeyMilo that don’t exactly match Tracker labels, it’s because they are **sub-stages mapped to Tracker’s main stage categories.**

Select:
* **ATS Type:** Tracker
* **Paste your Tracker Job ID**
This dropdown controls **which Tracker stage triggers HeyMilo screening**.
Important clarification: Tracker groups its internal stages under broad categories. HeyMilo shows a detailed dropdown representing those categories. If you see options in HeyMilo that don’t exactly match Tracker labels, it’s because they are **sub-stages mapped to Tracker’s main stage categories.**

Example
“First Interview,” “Interview Scheduled,” and “Phone Screen” may all fall under Tracker’s **Interview** category.
Choose the stage category where you want HeyMilo to automatically pick up candidates.
* You’ll see a success message confirming the mapping!
### Bring In Candidates Who Applied Before You Connected the Job
You linked your Tracker job to HeyMilo—but what about everyone who *already* applied before that? You don’t have to leave them behind.
**Where to find it:** Open your agent → **Integrations** → under **INBOUND**, click **Backfill Candidates**.
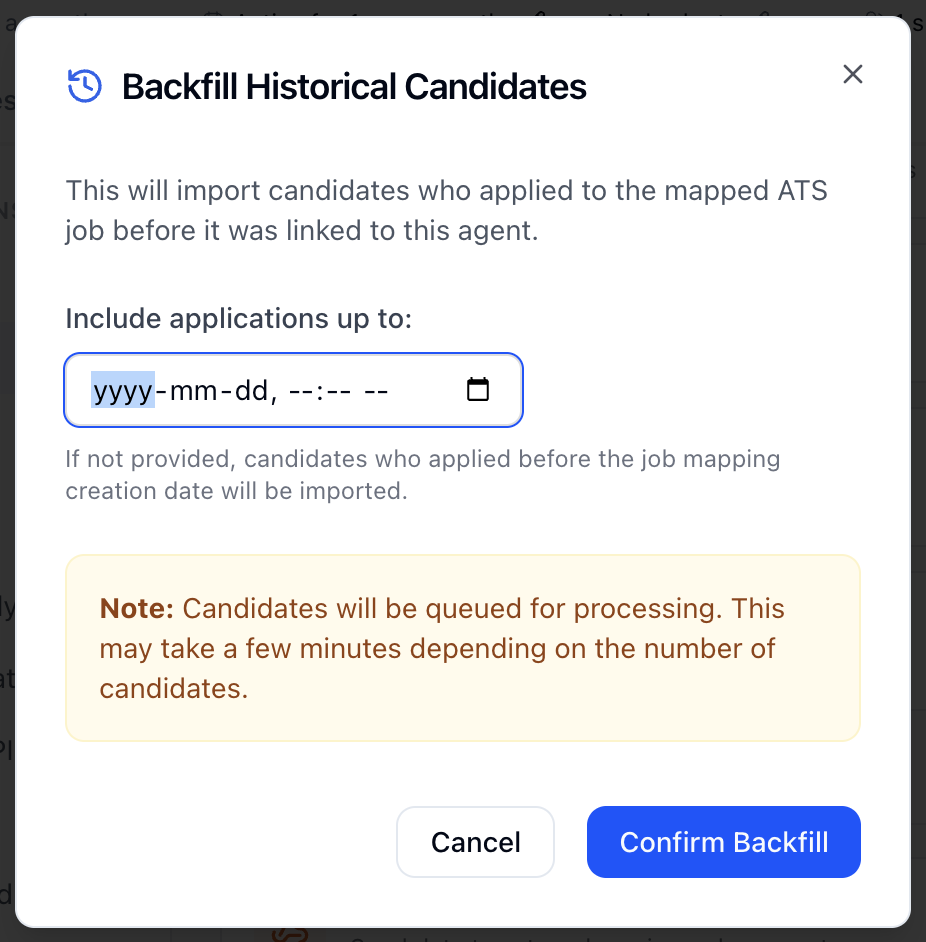 **What this does:** Backfill pulls in past applicants from the Tracker job you just connected. They’ll show up in your HeyMilo candidate list and go through the same screening flow as new applicants.
**How to do it:**
* Leave it blank to bring in everyone who applied before you connected the job.
* HeyMilo will bring those candidates in over the next few minutes.
When it’s done, you’ll see how many were added. They’ll appear in your candidate list shortly and you can screen them like anyone else.
### How Candidates Sync Into HeyMilo
**What this does:** Backfill pulls in past applicants from the Tracker job you just connected. They’ll show up in your HeyMilo candidate list and go through the same screening flow as new applicants.
**How to do it:**
* Leave it blank to bring in everyone who applied before you connected the job.
* HeyMilo will bring those candidates in over the next few minutes.
When it’s done, you’ll see how many were added. They’ll appear in your candidate list shortly and you can screen them like anyone else.
### How Candidates Sync Into HeyMilo
Automatic Screening
Once the job is mapped:
* When a candidate moves into the selected Tracker stage
* HeyMilo automatically ingests the candidate
* Automated engagement and conversational screening begins based on your agent configuration
For example:
If you select **First Interview** in HeyMilo:
* Candidates entering **First Interview** in Tracker
→ Will be picked up by HeyMilo
→ Will be engaged + screening automatically
You can also manually add candidates to this stage to trigger HeyMilo instantly.
### Review HeyMilo Results in Tracker
After the candidate completes their assessment, HeyMilo writes the data back into the candidate’s profile under **Activity**:

Inside Activity, you’ll see:
* Candidate match score (overall score)
* Interview PDF report with comprehensive summaries & evaluation details
* Audio/video links
* Timestamp
This Activity appears under:
**Candidate Profile → Activities** or **Opportunity → Shortlist & Activities**
Recruiters can review all results directly from Tracker.
### Option 2: 📥 Import Jobs from Tracker (Auto-Create Agents)
Skip the manual setup. You can import jobs directly from Tracker and HeyMilo will automatically create an agent for each one — ready to start screening as soon as candidates apply.
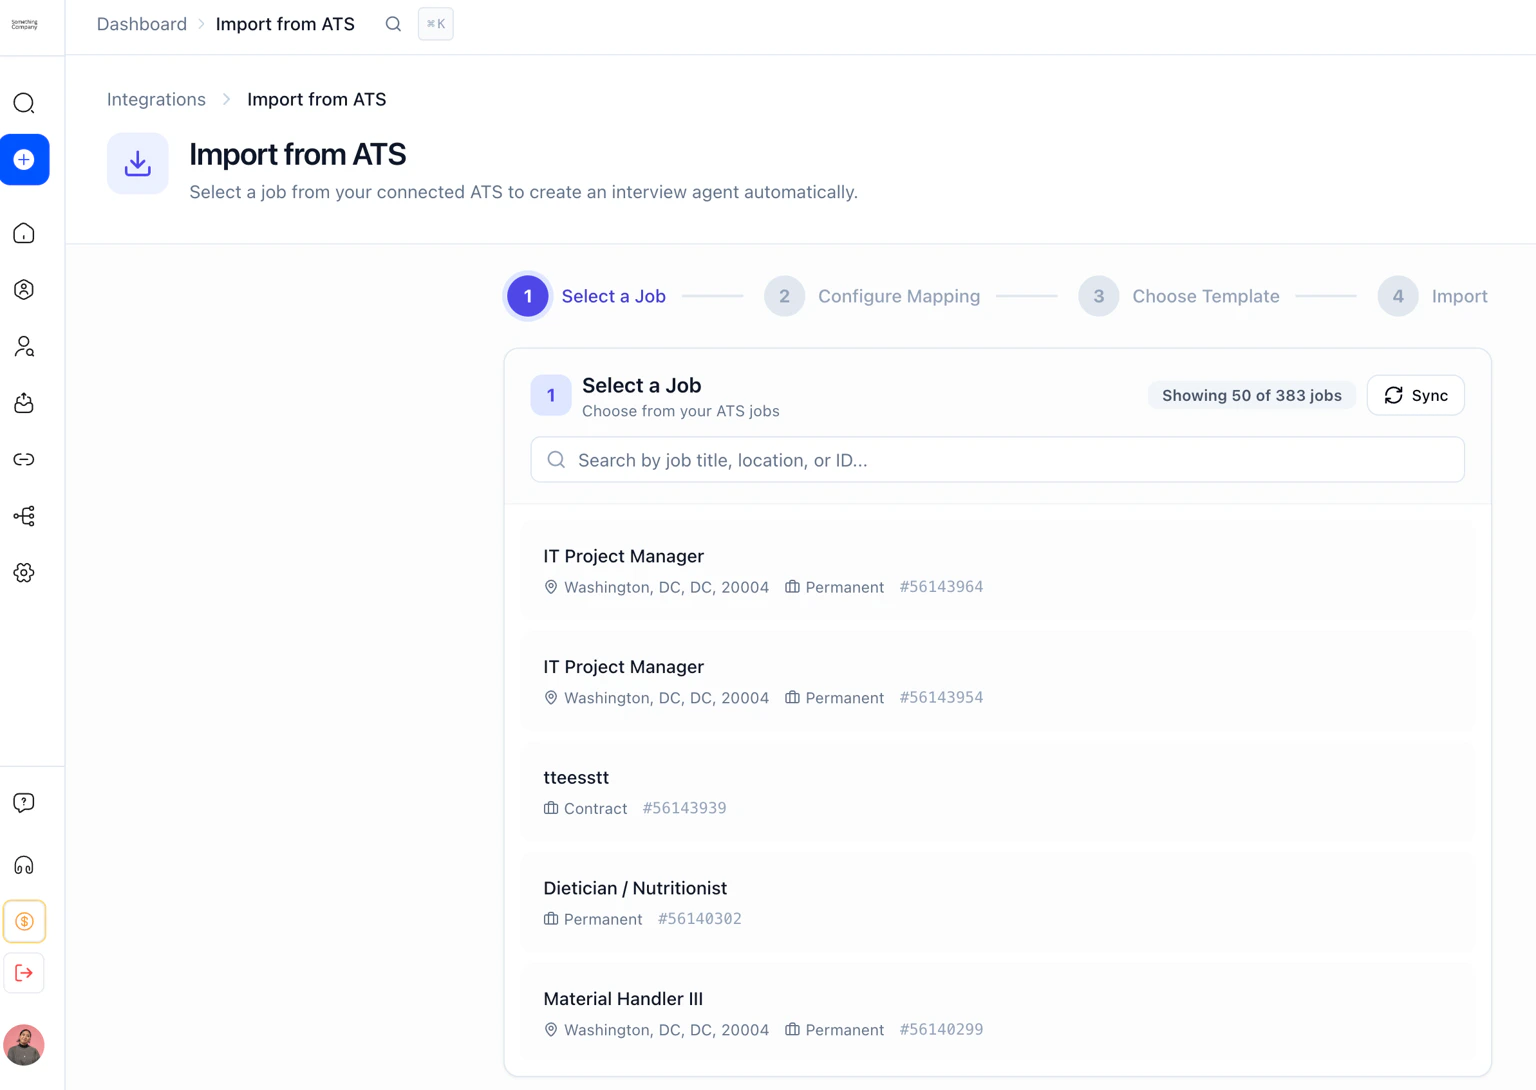 **Where to find it**: HeyMilo → Integrations → Import from ATS
**What this does**: Pulls in your active Tracker jobs and auto-creates a matching HeyMilo agent per job, pre-mapped to the Tracker Job ID. No copy-pasting, no one-by-one setup.
### Reminder
* HeyMilo only screens candidates once they reach the selected stage
* Tracker’s internal stage structure is simplified in HeyMilo’s dropdown
* Multiple jobs can be mapped to multiple HeyMilo agents
* You can remap or remove job mappings at any time
### **Additional resources**
For additional information not covered here, reach out to [support@heymilo.ai](mailto:support@heymilo.ai)
**Where to find it**: HeyMilo → Integrations → Import from ATS
**What this does**: Pulls in your active Tracker jobs and auto-creates a matching HeyMilo agent per job, pre-mapped to the Tracker Job ID. No copy-pasting, no one-by-one setup.
### Reminder
* HeyMilo only screens candidates once they reach the selected stage
* Tracker’s internal stage structure is simplified in HeyMilo’s dropdown
* Multiple jobs can be mapped to multiple HeyMilo agents
* You can remap or remove job mappings at any time
### **Additional resources**
For additional information not covered here, reach out to [support@heymilo.ai](mailto:support@heymilo.ai)